Difference between revisions of "Wiring/cs"
(Created page with "Ujistěte se, že je typ přijímače v konfiguračním software nastaven na Spektrum DSM2/X, jinak nebude fungovat spojení ani párovací proces. Nikdy nepřipojujte propojk...") |
(Created page with "ZAPOJENÍ FUTABA S-BUS PŘIJÍMAČE") |
||
| Line 124: | Line 124: | ||
| − | == | + | == ZAPOJENÍ FUTABA S-BUS PŘIJÍMAČE == |
Revision as of 10:46, 6 October 2016
Systém Spirit lze zapojit jako gyro, stabilizační a záchranný systém. Zapojení jednotky se odvíjí také od typu přijímače.
POZOR
Spirit je předprogramován na serva s neutrálním impulsem 1520μs a frekvencí 50Hz – prověřte typ všech serv a zjistěte parametry u výrobce.
Některé konektory serv mají nestandardní rozměry, kvůli kterým hrozí, že budou zasahovat do sousedních pozic po zapojení do jednotky. Jako řešení doporučujeme vyměnit je např. za JR či Futaba konektor.
Nikdy nepřipojujte propojky určené k napájení do pozice SYS a ELE/PIT/AIL!
Contents
1 GYRO
R/C models can take advantage of the full capabilities of the Spirit unit. The Spirit will stabilize the model on all axes and also make it less affected by wind or other unfavorable conditions. When properly set up, flight characteristics should be more stable which will give you the confidence to carry out even the most challenging maneuvers.
Neverthless you can also completely disable the unit' operation so that the control will be same as without the system. Then it can be anytime re-enabled during the flight.
| Spirit |
| CH1 – 1. servo křidélek / elevonu |
| CH2 – servo výškovky |
| CH3 – 2. servo křidélek / elevonu |
| CH4 – servo směrovky |
| Spirit Pro |
| CH1 – 1. servo křidélek / elevonu |
| CH2 – servo výškovky |
| CH3 – 2. servo křidélek / elevonu |
| CH4 – servo směrovky |
| CH0 – přídavné (volitelně) servo |
POZNÁMKA
Samokřídla (Delta) mohou využít pro serva pouze výstupy CH1 a CH3.
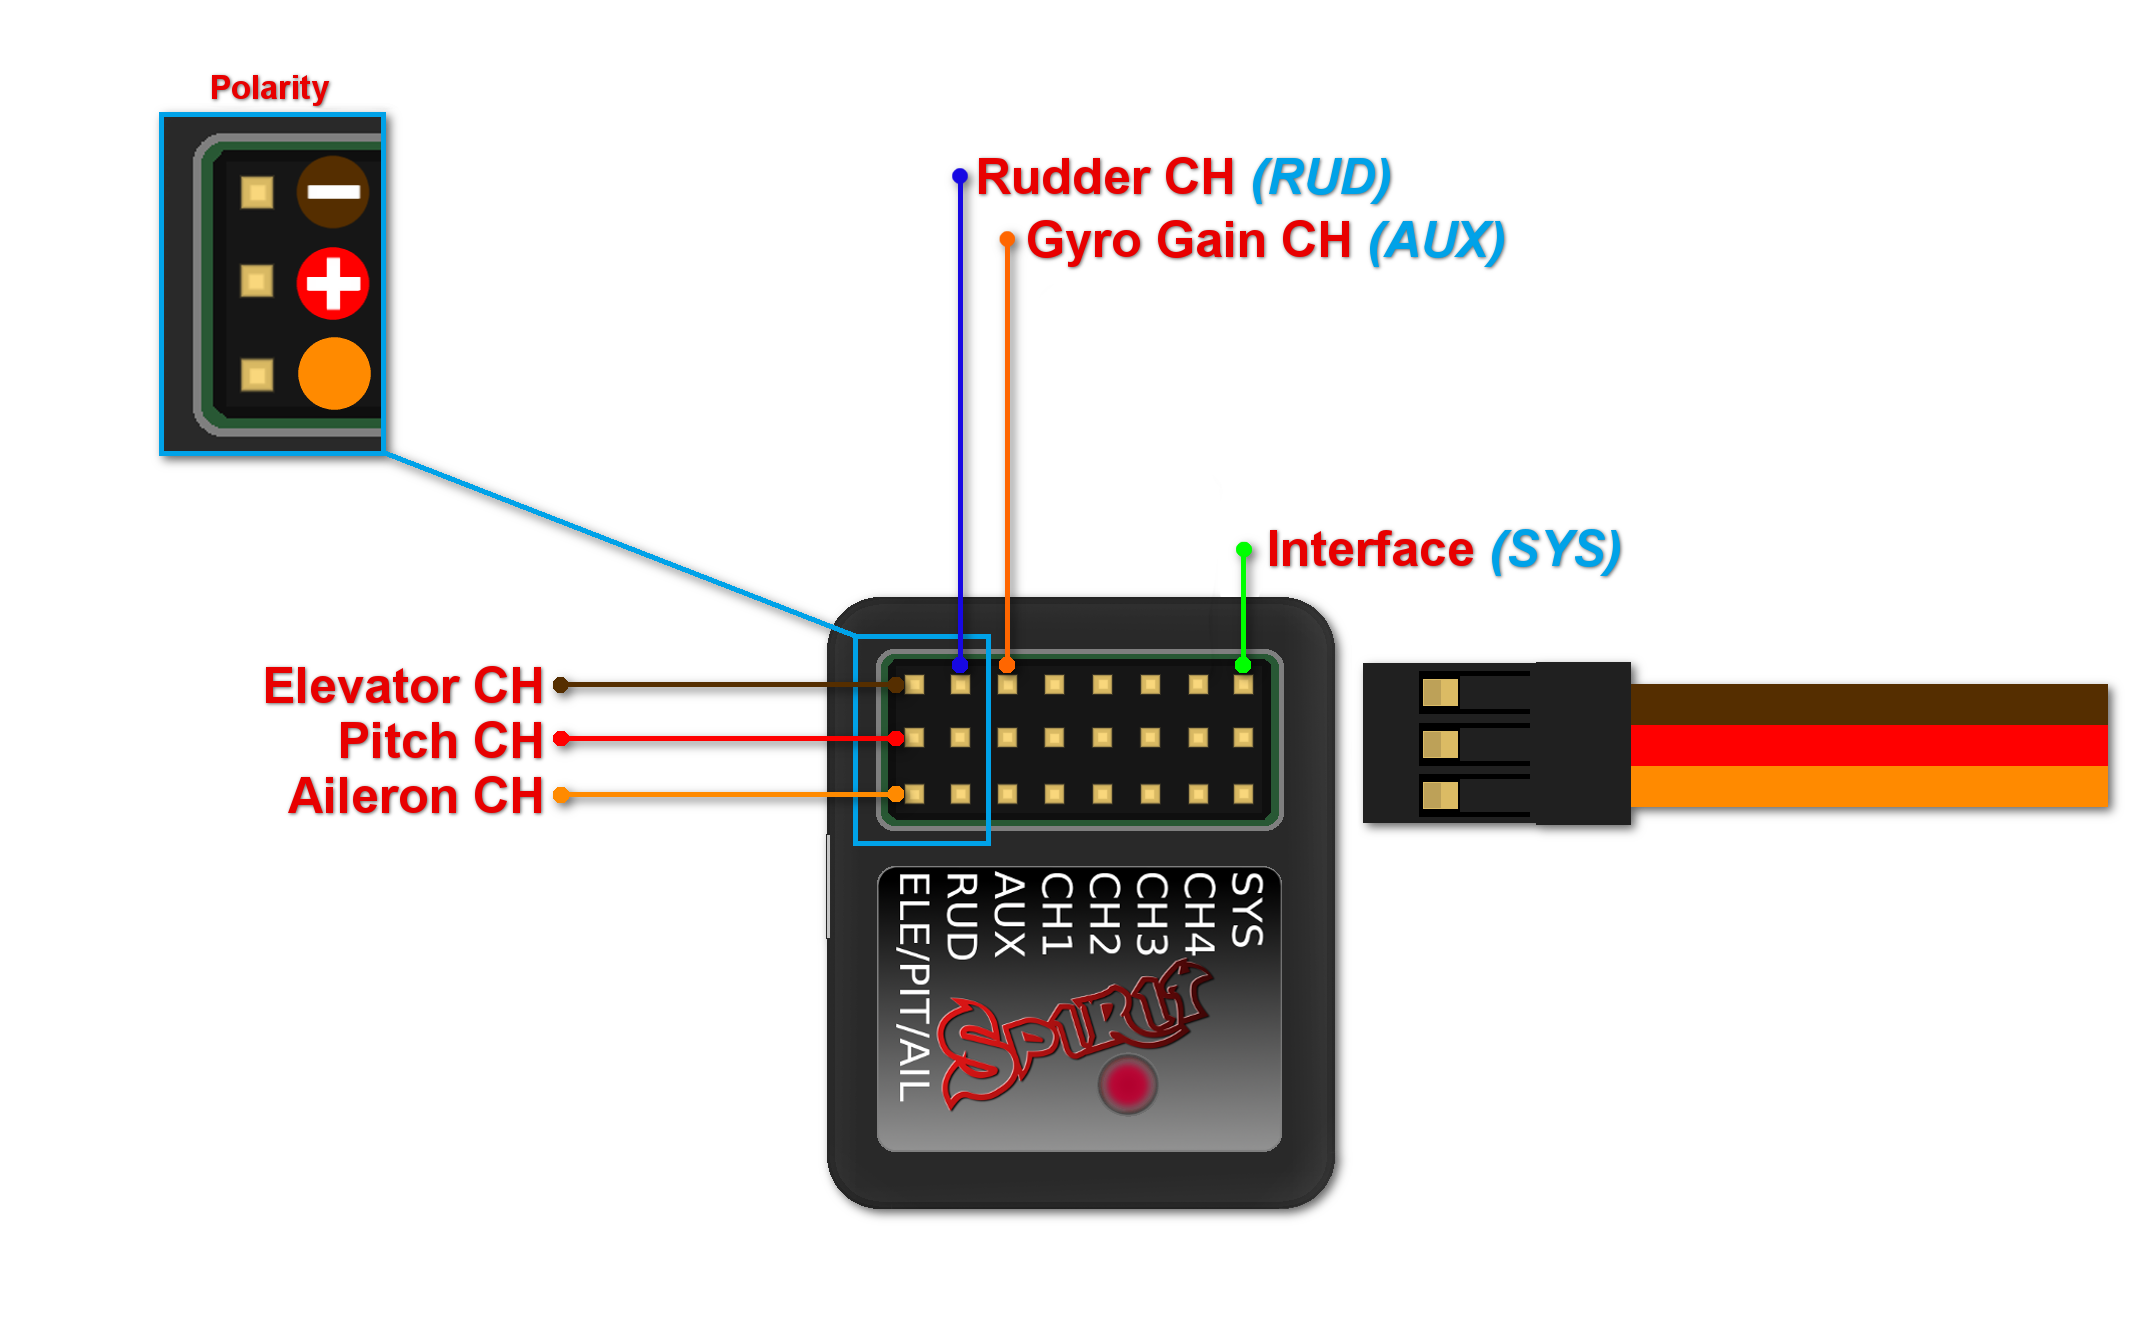
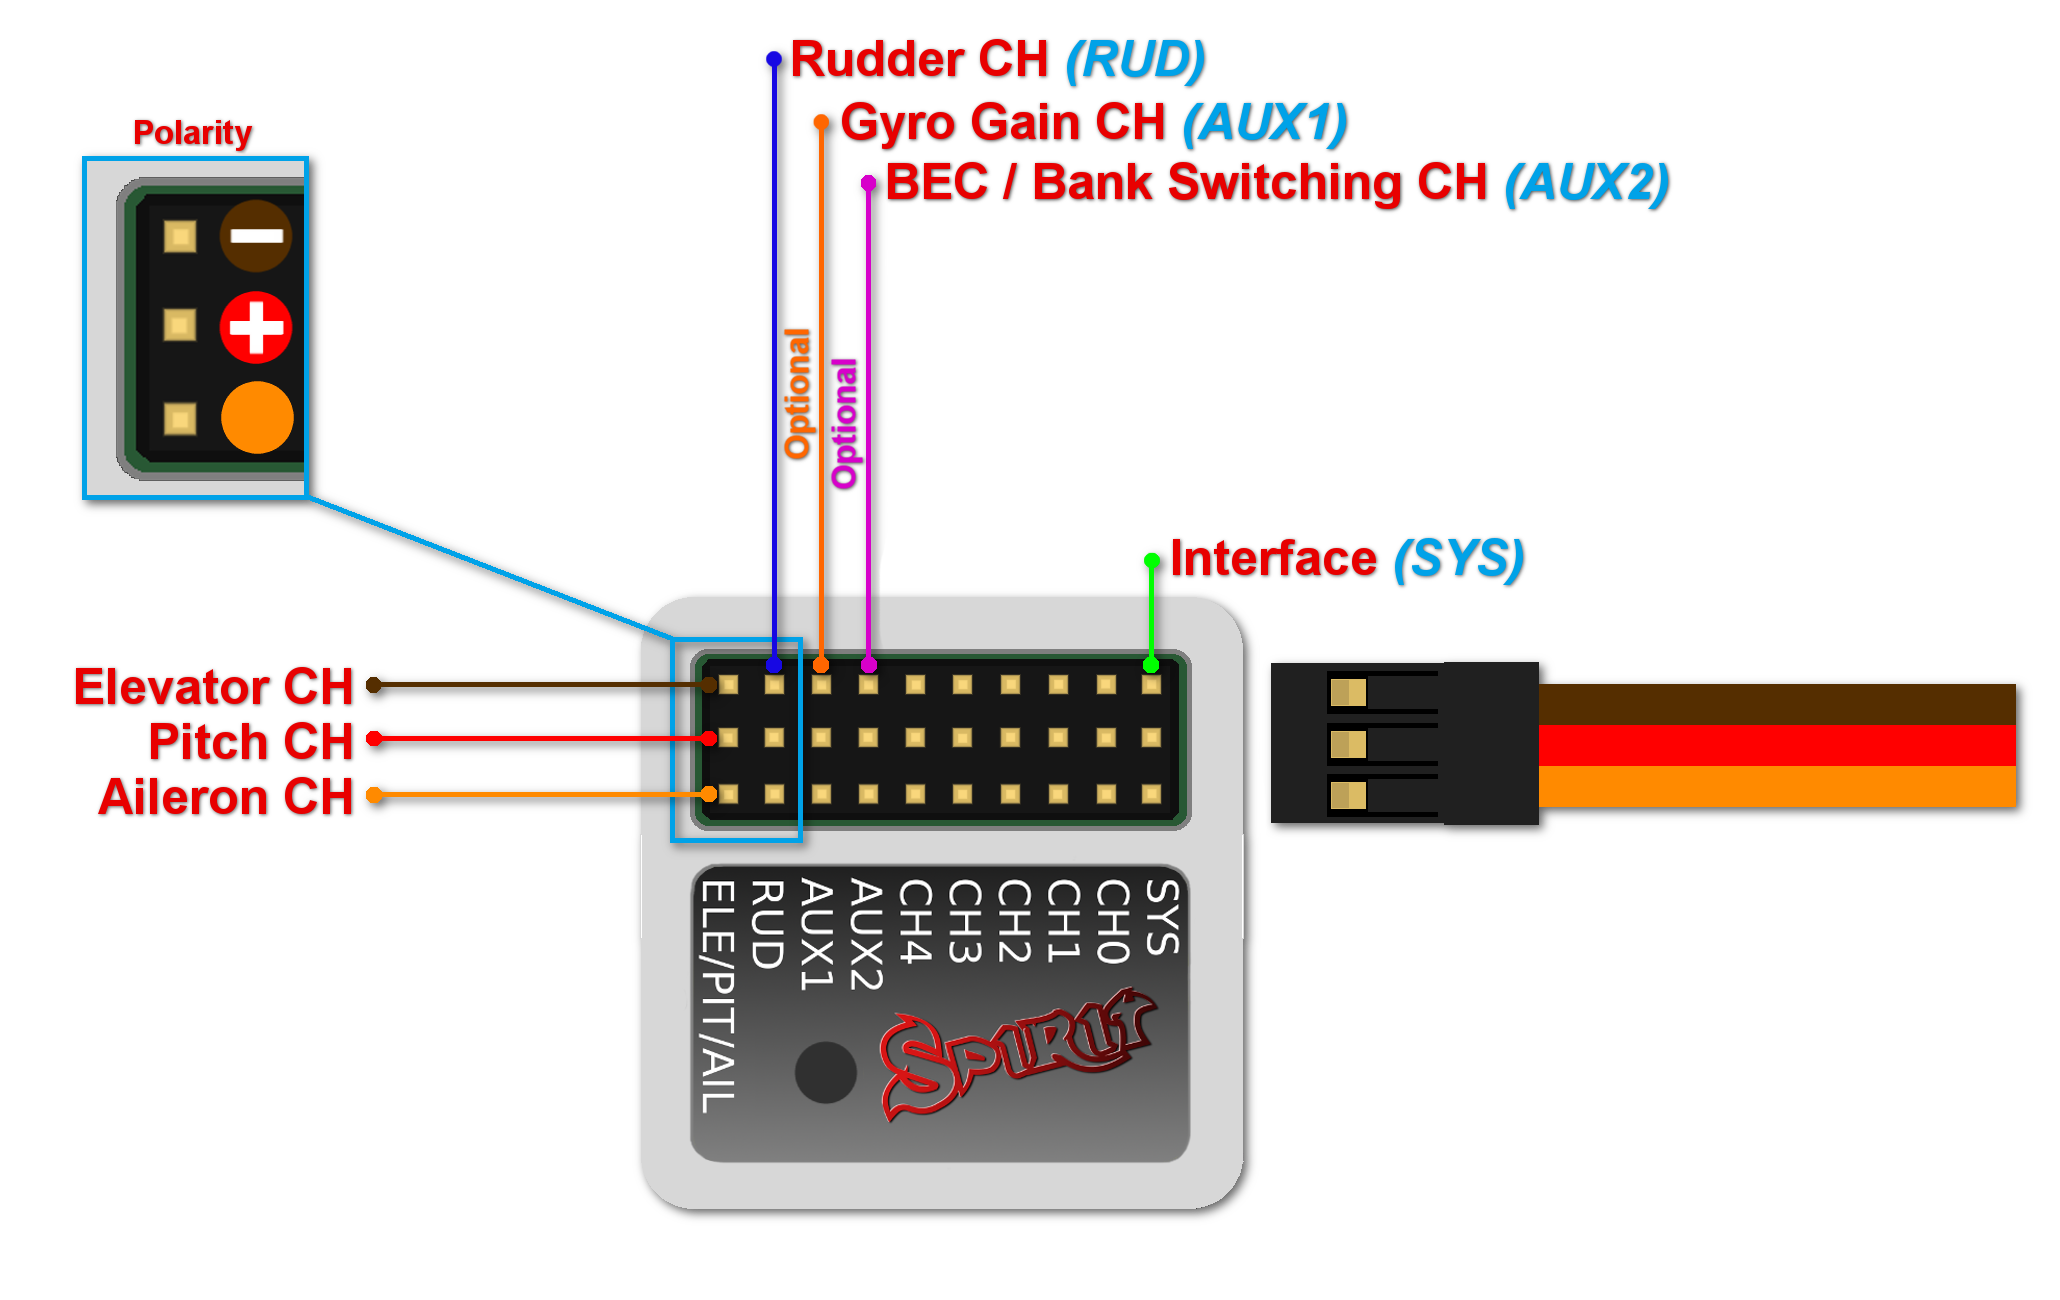
2 ZAPOJENÍ KLASICKÉHO PŘIJÍMAČE (s PWM modulací)
Spirit – typ přijímače PWM
Spirit Pro – typ přijímače PWM
V případě propojení s klasickým přijímačem využijte speciální propojku, kde tři konektory připojíte do přijímače a jeden do jednotky.
Jednotka je napájena pomocí dvou propojek z přijímače připojených do pozice AUX a RUD. Kanál plynu by měl být připojen přímo do přijímače.
The easiest way you can start connect RUD with Rudder output in the receiver. Then continue with AUX which should be connected to the Gyro Gain channel output. Next, connect the Aileron, Elevator and Pitch (Aileron 2) channels. If you are not sure whether you have the correct output or not, you can plug in one servo and power the unit to verify that your connection is correct. This can be repeated for each servo. The diagnostics tab is very helpful too.
Nikdy nepřipojujte propojky určené k napájení do pozice SYS a ELE/PIT/AIL!
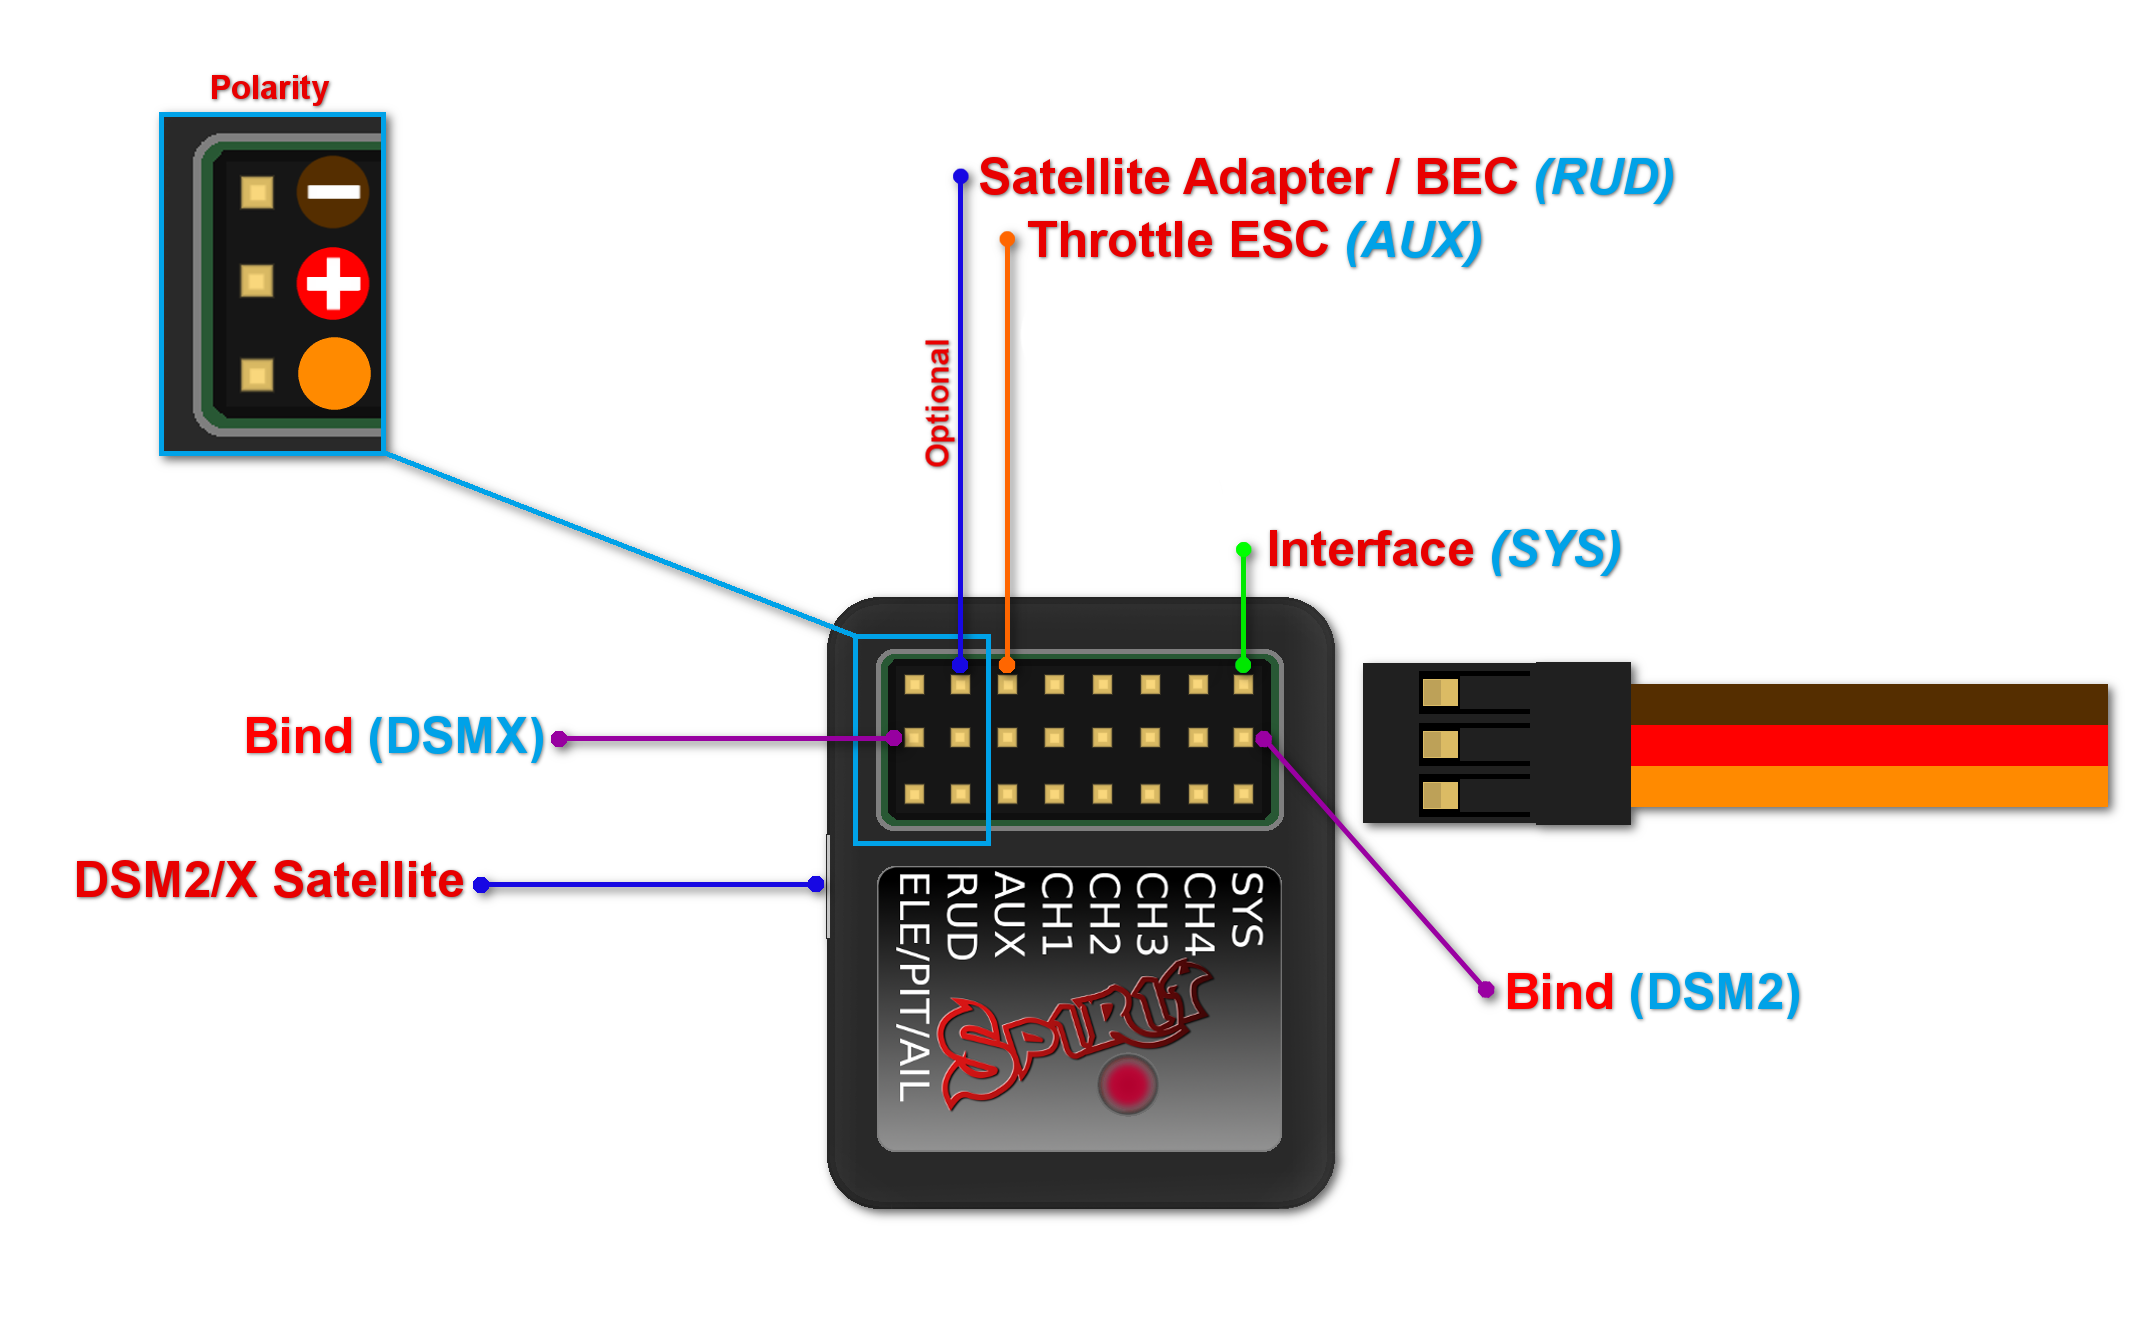
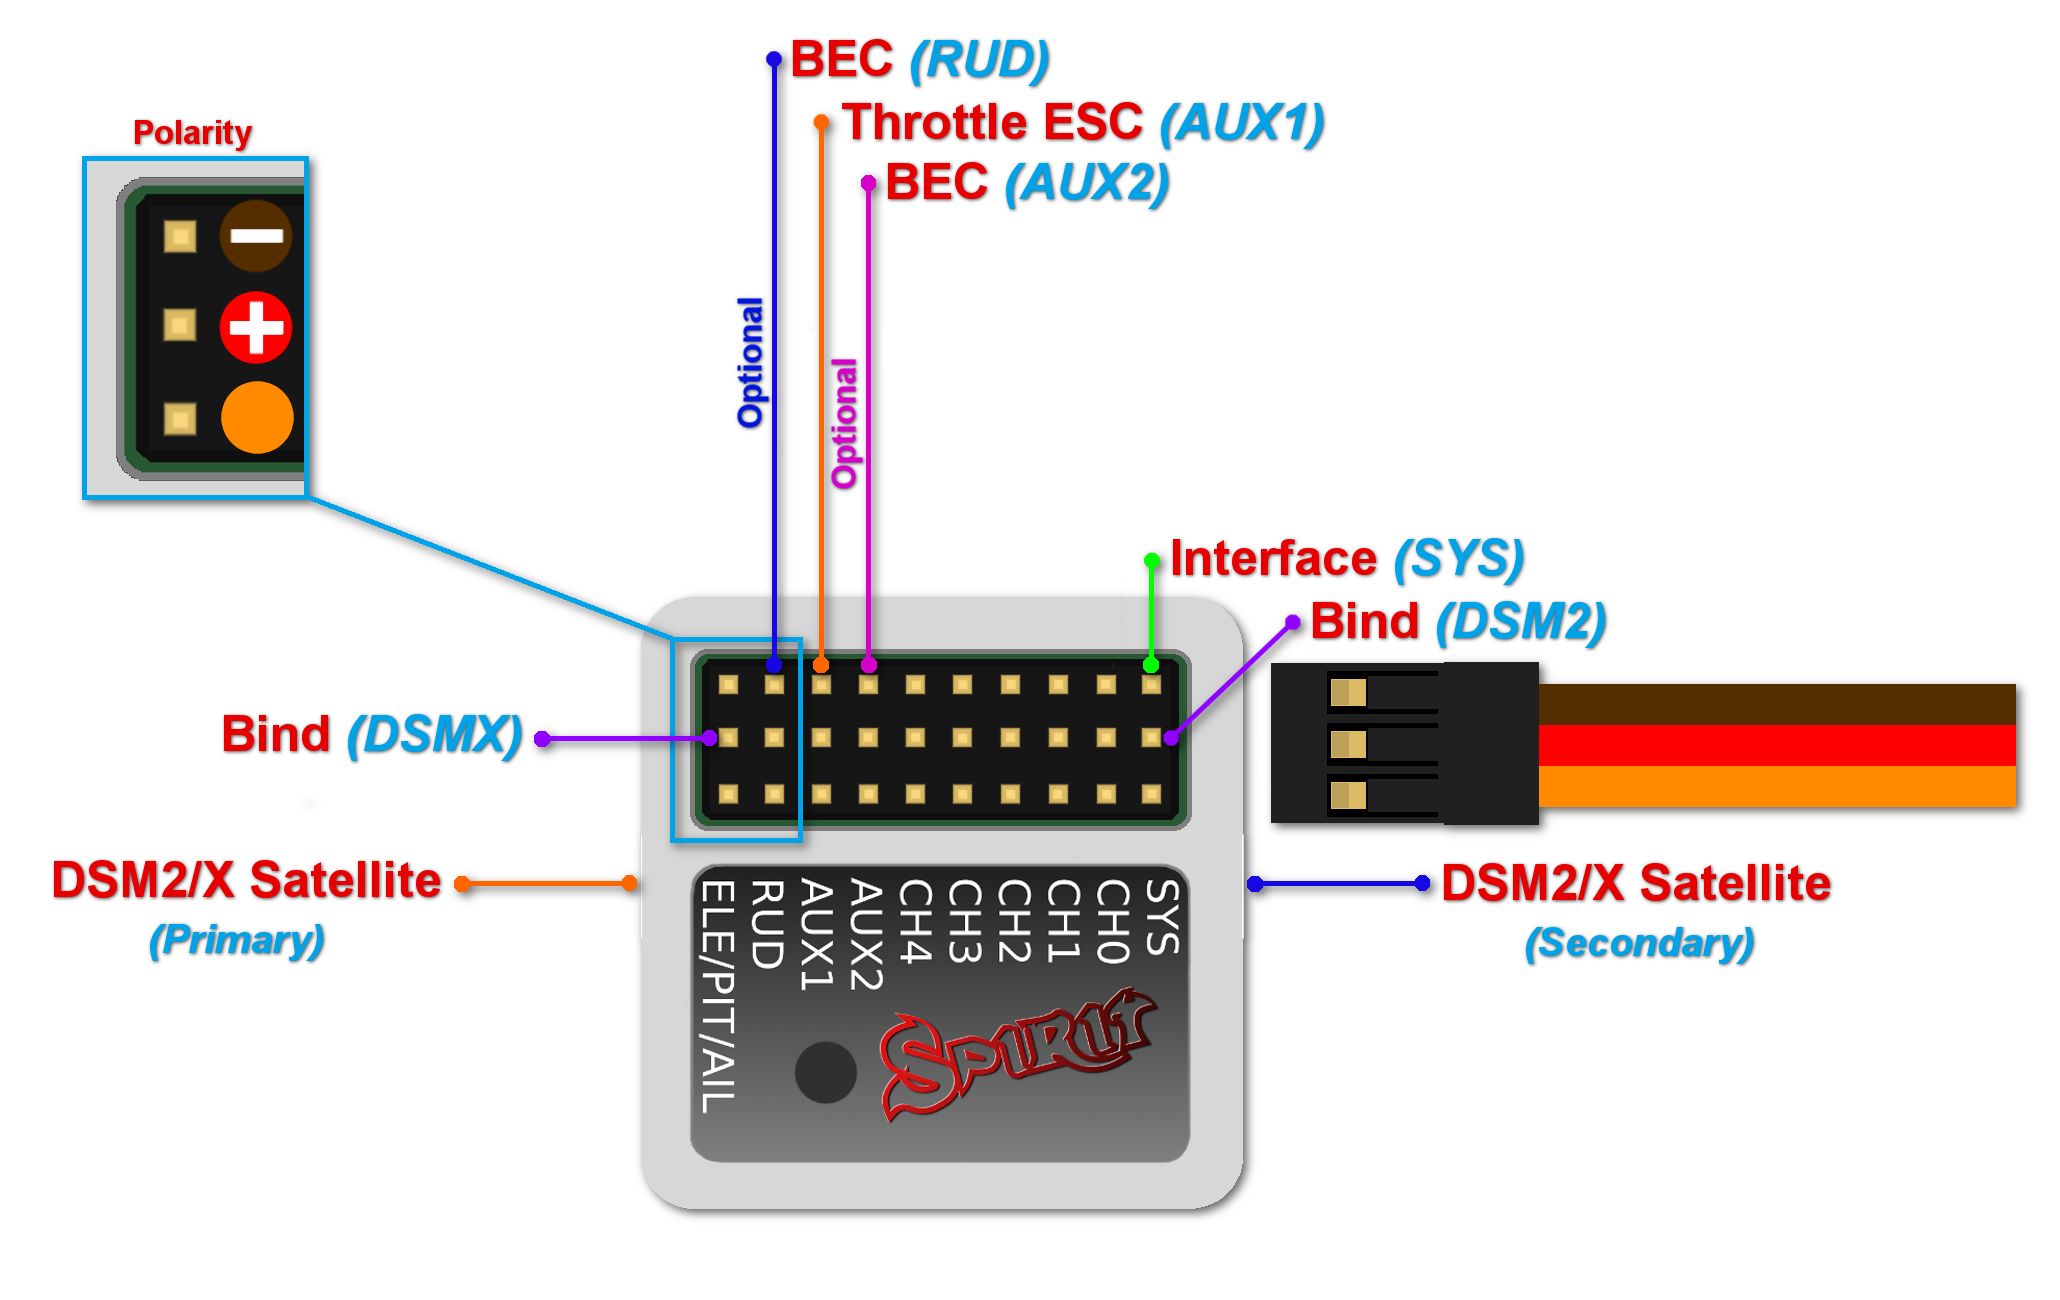
3 ZAPOJENÍ SPEKTRUM DSM2/X SATELITŮ
Spirit – typ přijímače Spektrum DSM2/X
Spirit Pro – typ přijímače Spektrum DSM2/X
Připojení BECu je volitelné. V případě, že je model napájen externím zdrojem (jiným než z interního BEC regulátoru) je nutné připojit BEC do pozice RUD.
Proces párování je proveden za pomocí propojky dodávané se Spektrum soupravou tak, že se nejdříve připojí do pozice SYS (pro DSM2) či ELE/PIT/AIL (pro DSMX) a následně zapne napájení jednotky. V tu chvíli satelity musí začít blikat a vy tak můžete provést párování s vysílačem. V případě úspěchu stavová LED na jednotce zhasne, kdežto na satelitech začne svítit.
Ujistěte se, že je typ přijímače v konfiguračním software nastaven na Spektrum DSM2/X, jinak nebude fungovat spojení ani párovací proces. Nikdy nepřipojujte propojky určené k napájení do pozice SYS a ELE/PIT/AIL!
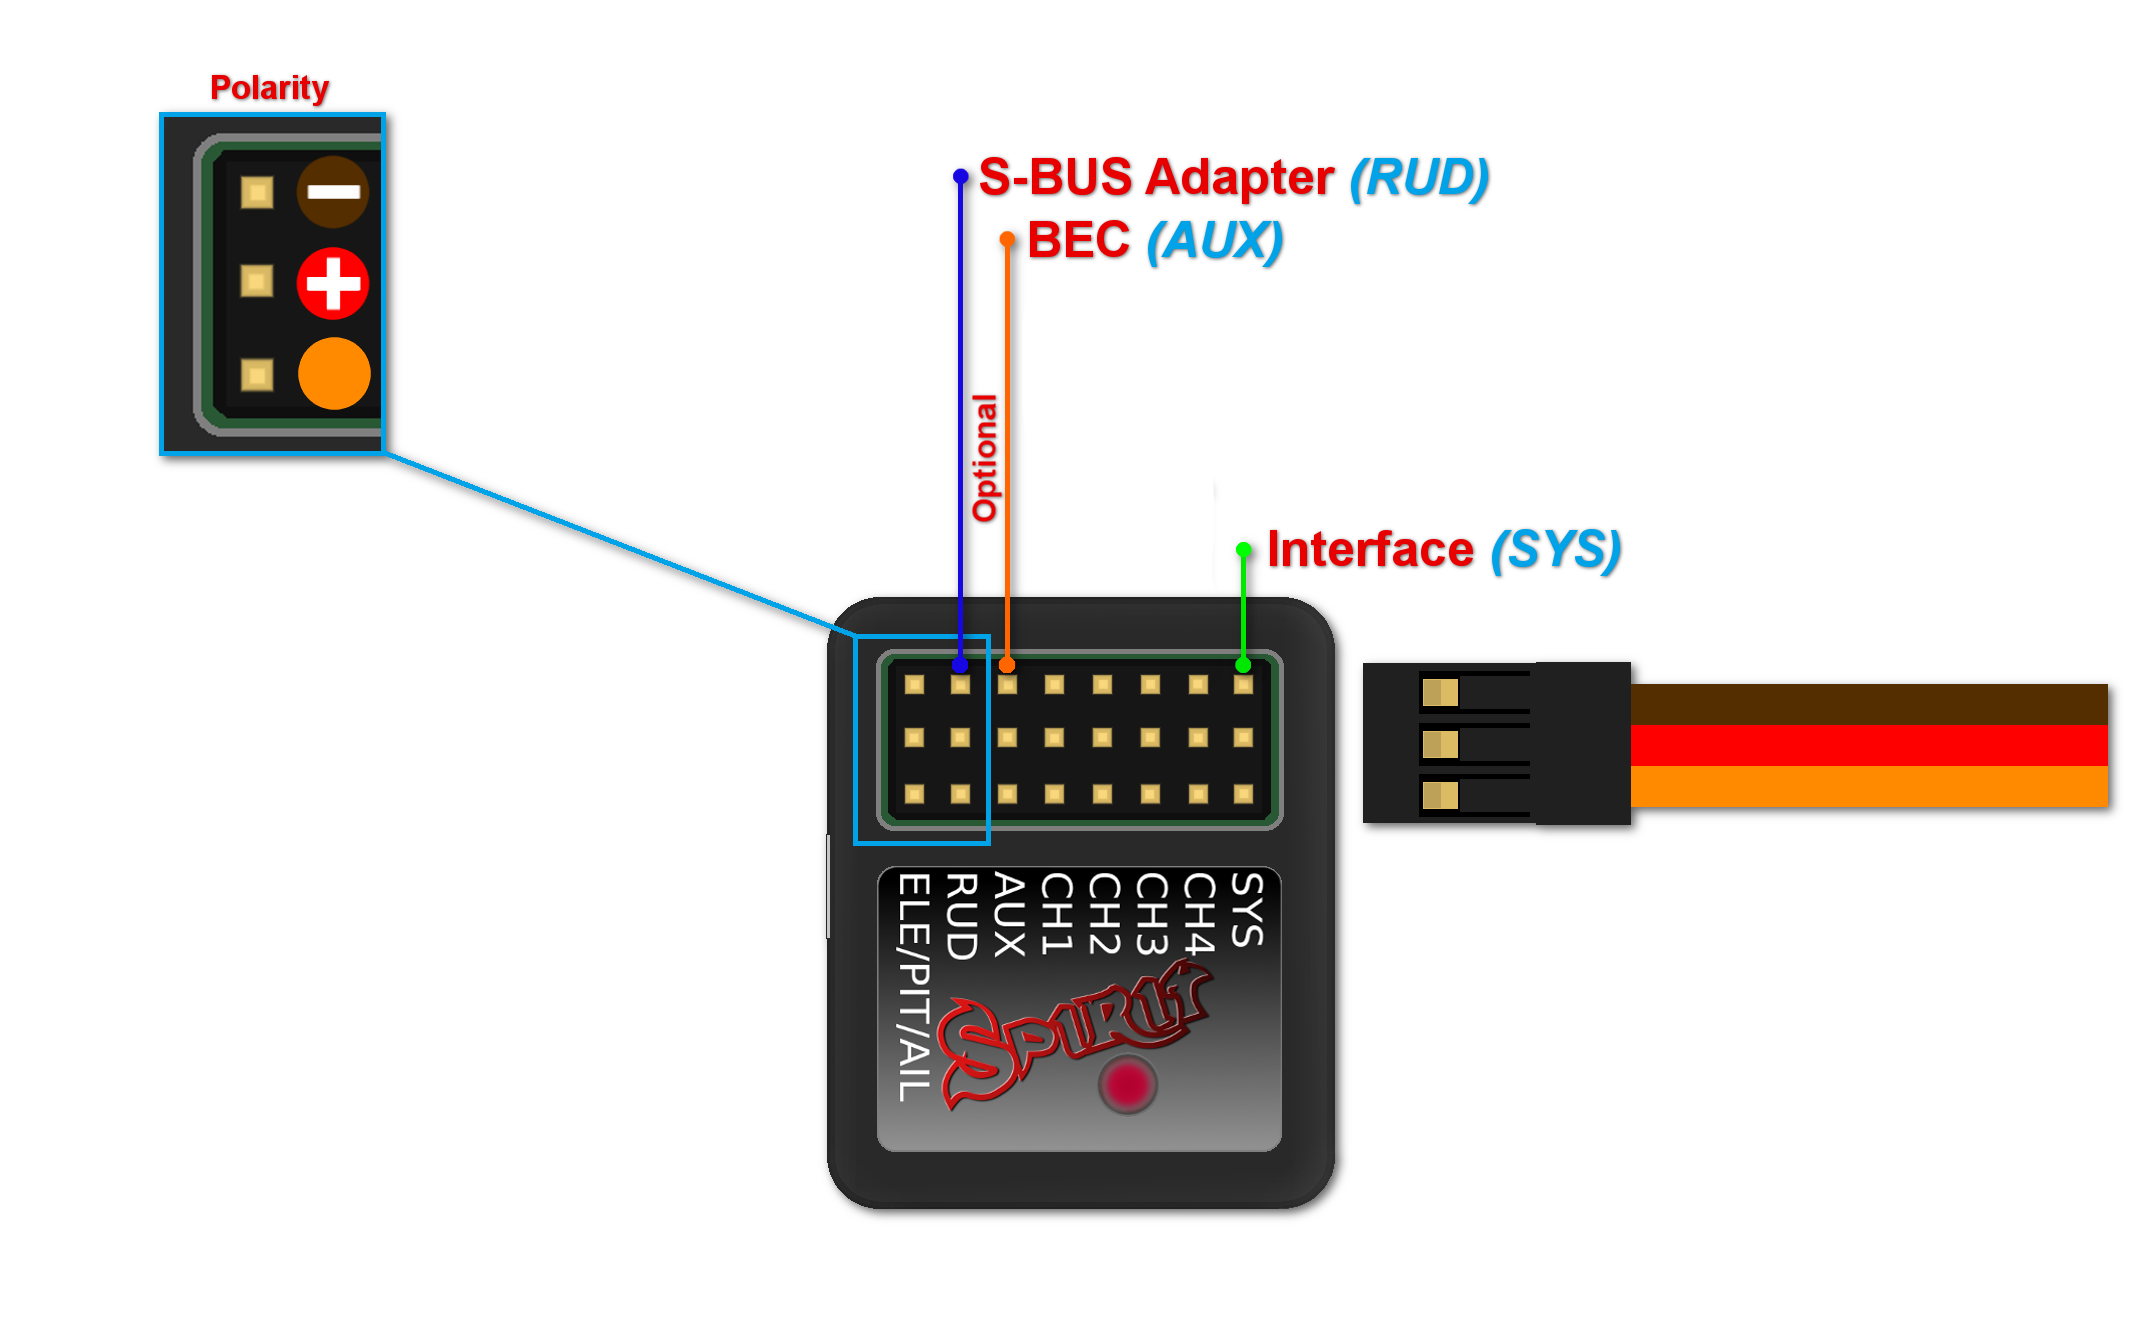
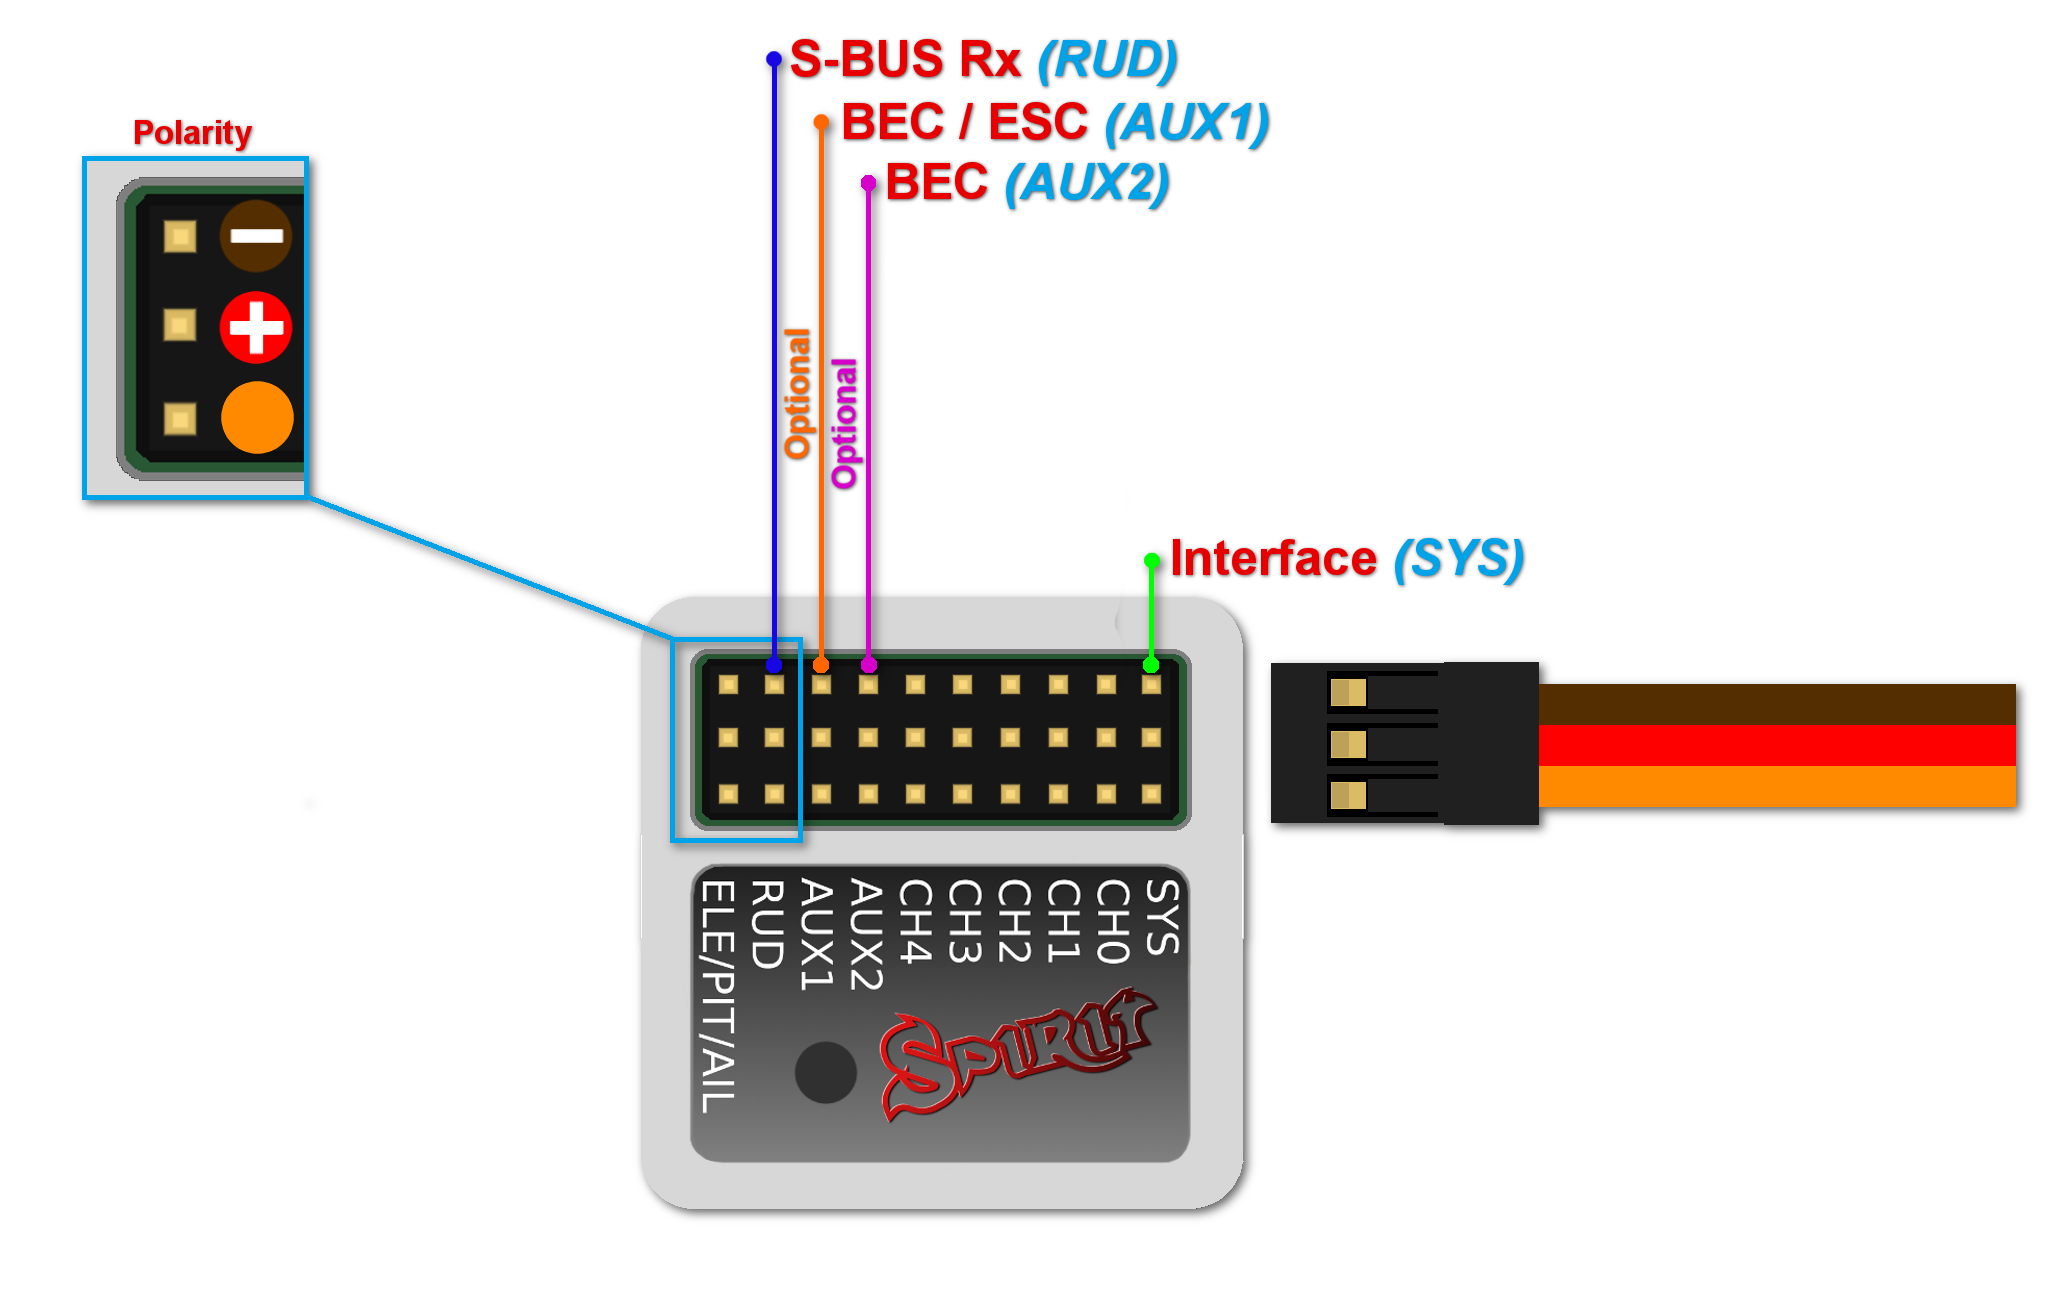
4 ZAPOJENÍ FUTABA S-BUS PŘIJÍMAČE
Spirit – receiver type: Futaba S-BUS
Spirit Pro – receiver type: Futaba S-BUS
Connection to a BEC is optional. For models with standard size servos it is recommended to use dual power supply cables due to the increased power consumption. That means besides the S-BUS cable, an additional power supply cable should be connected to the AUX port.
When using this type of receiver you can connect the throttle cable directly to the receiver. Alternatively, you can assign the throttle channel in the software and use the AUX as throttle output from the unit.
Never plug a connector for powering the unit to SYS or ELE/PIT/AIL ports.
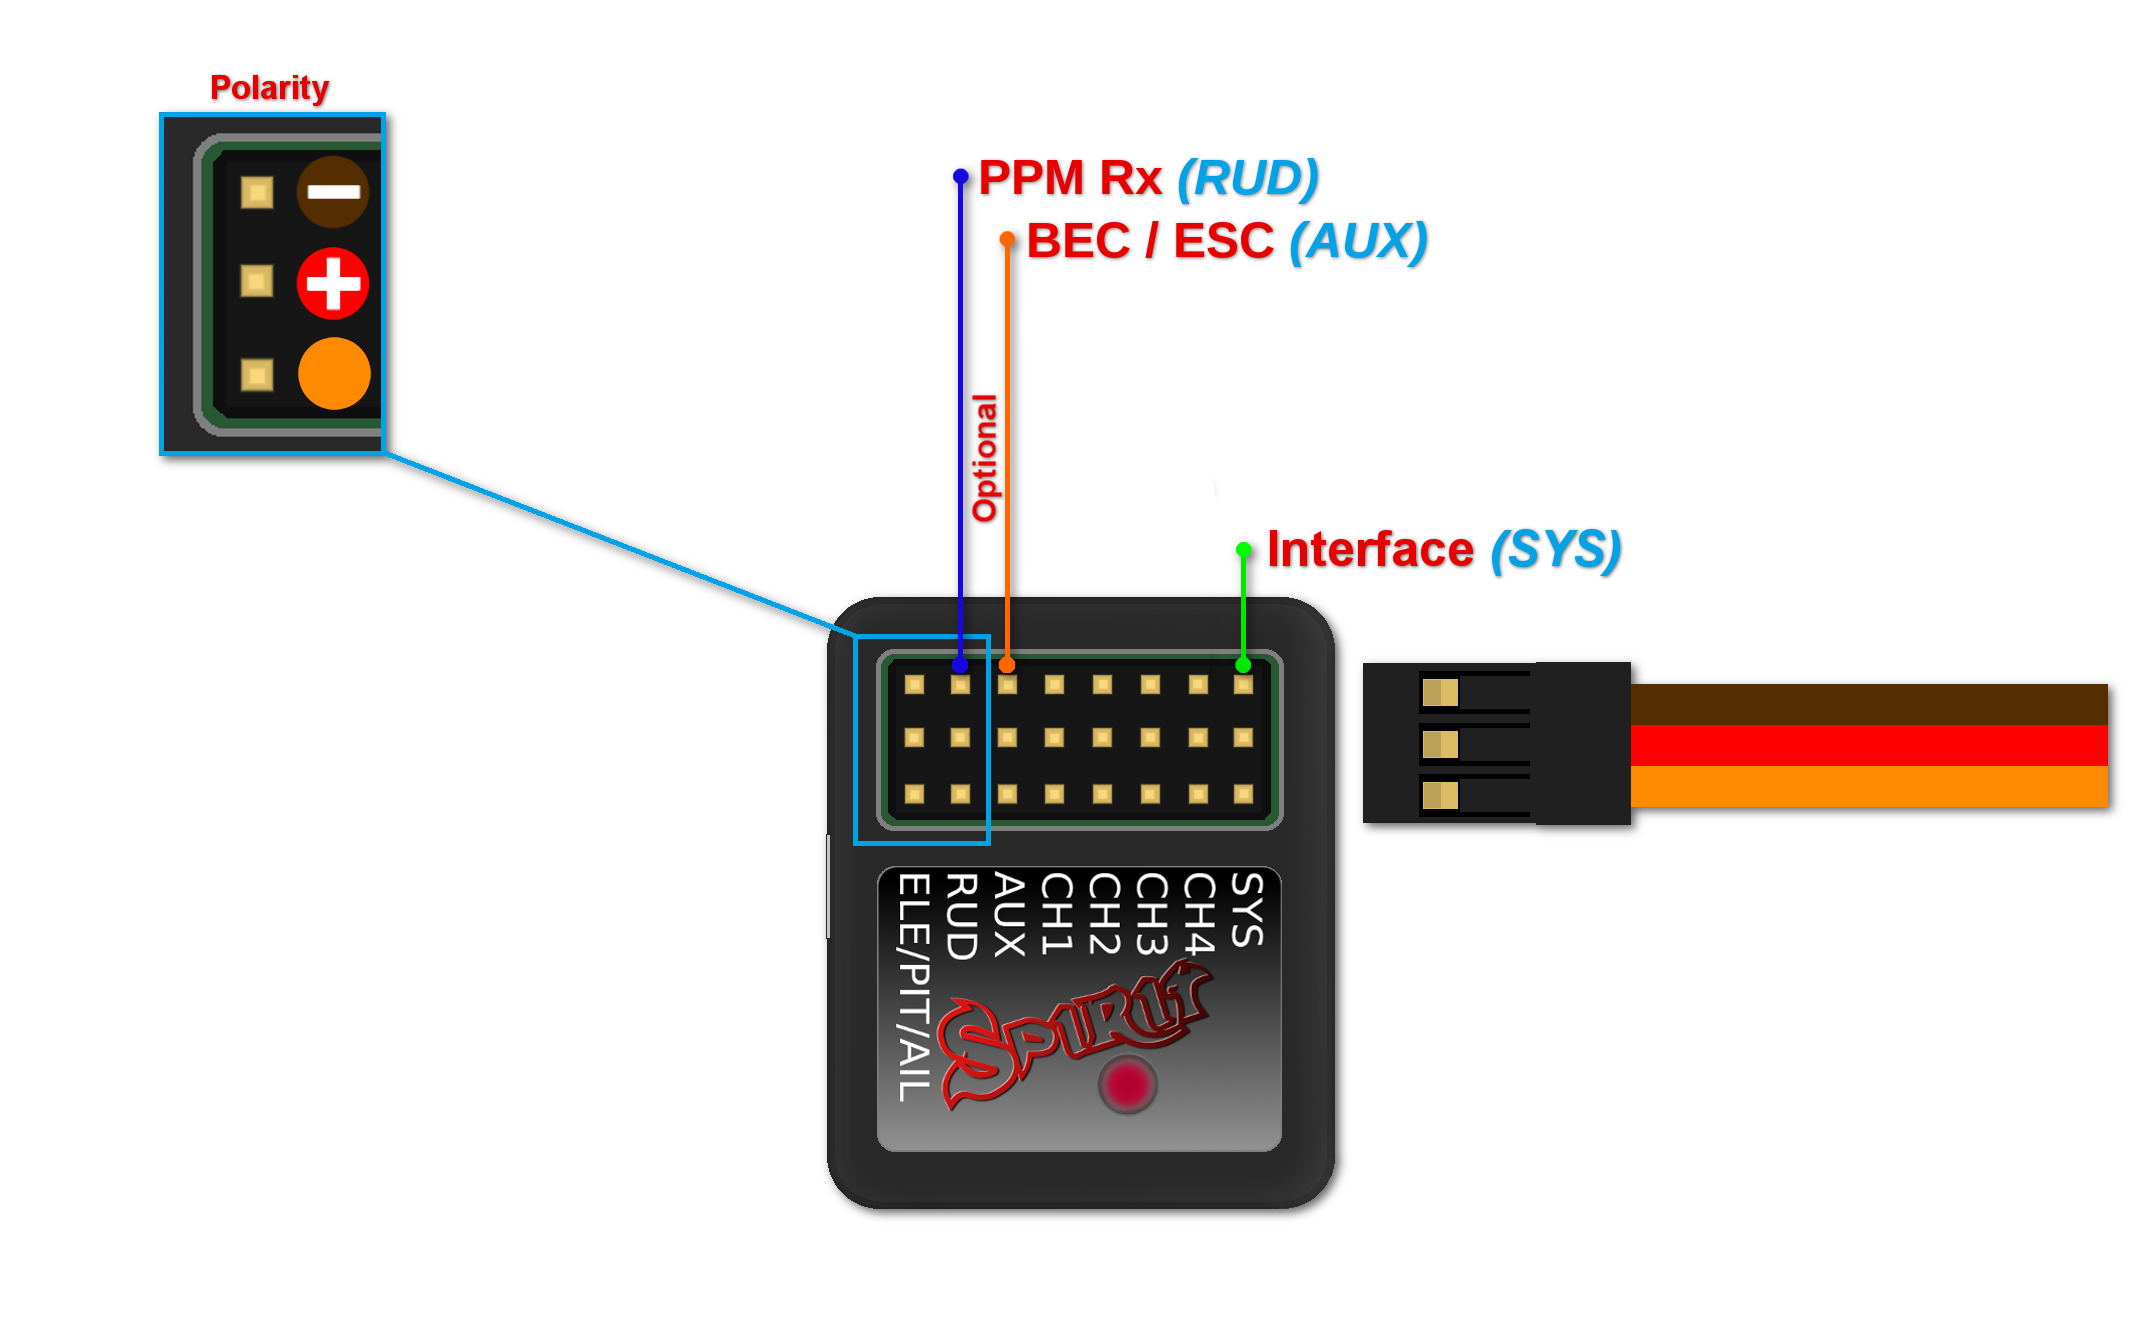
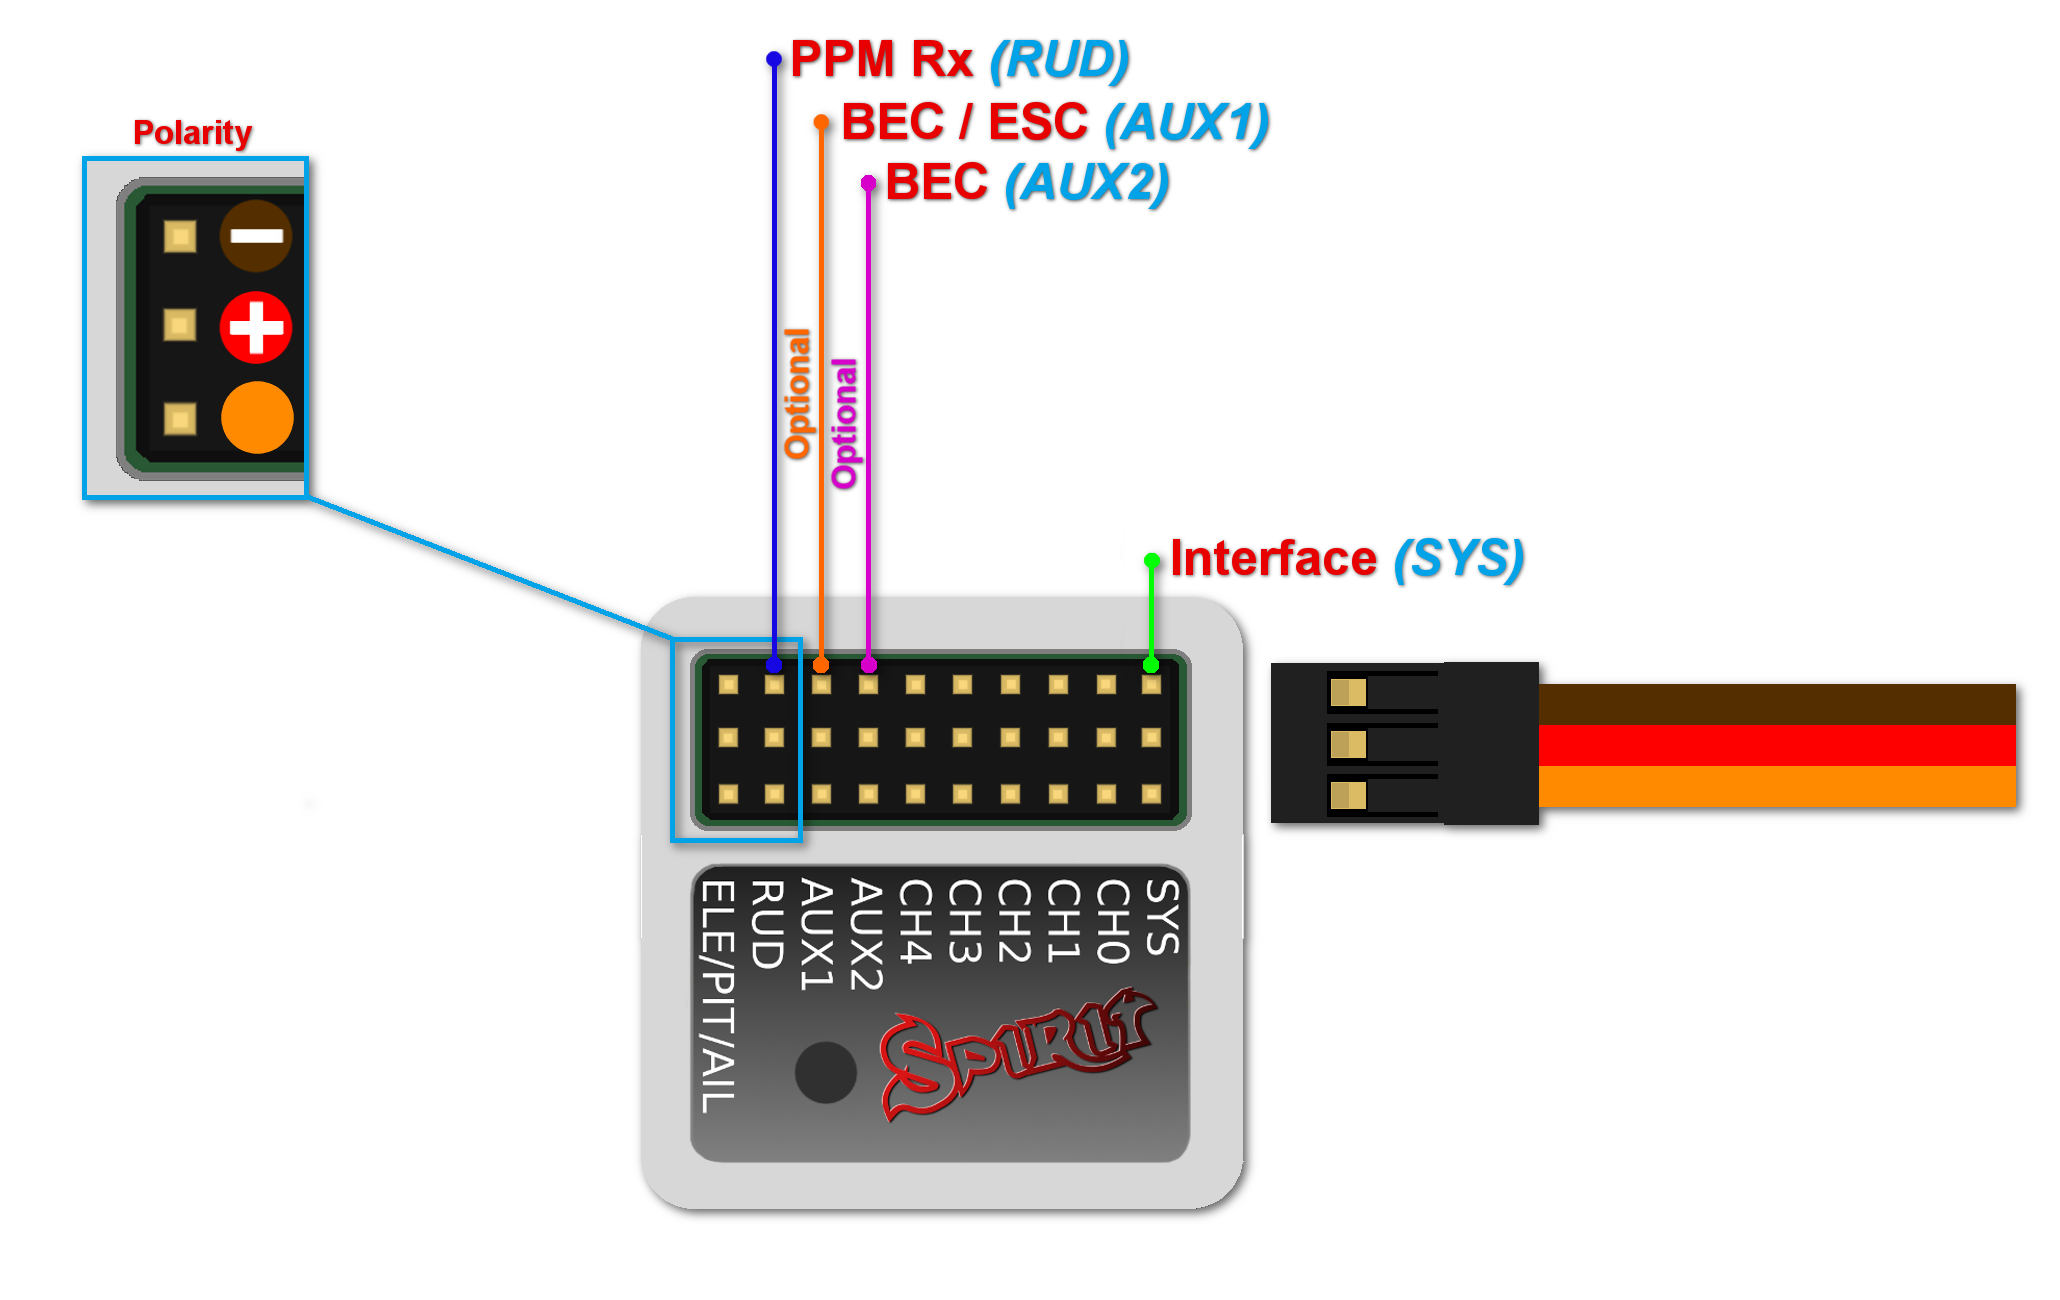
5 CONNECTION OF PPM RECEIVER
Spirit – receiver type: PPM
Spirit Pro – receiver type: PPM
NOTE
Connection to a BEC is optional. For models with standard size servos it is recommended to use dual power supply cables due to the increased power consumption. That means besides the communication cable, an additional power supply cable should be connected to the AUX port.
When using this type of receiver you can connect the throttle cable directly to the receiver. Alternatively, you can assign the throttle channel in the software and use the AUX as throttle output from the unit.
Never plug a connector for powering the unit to SYS or ELE/PIT/AIL ports.
6 CONNECTION OF JETI EX BUS RECEIVER
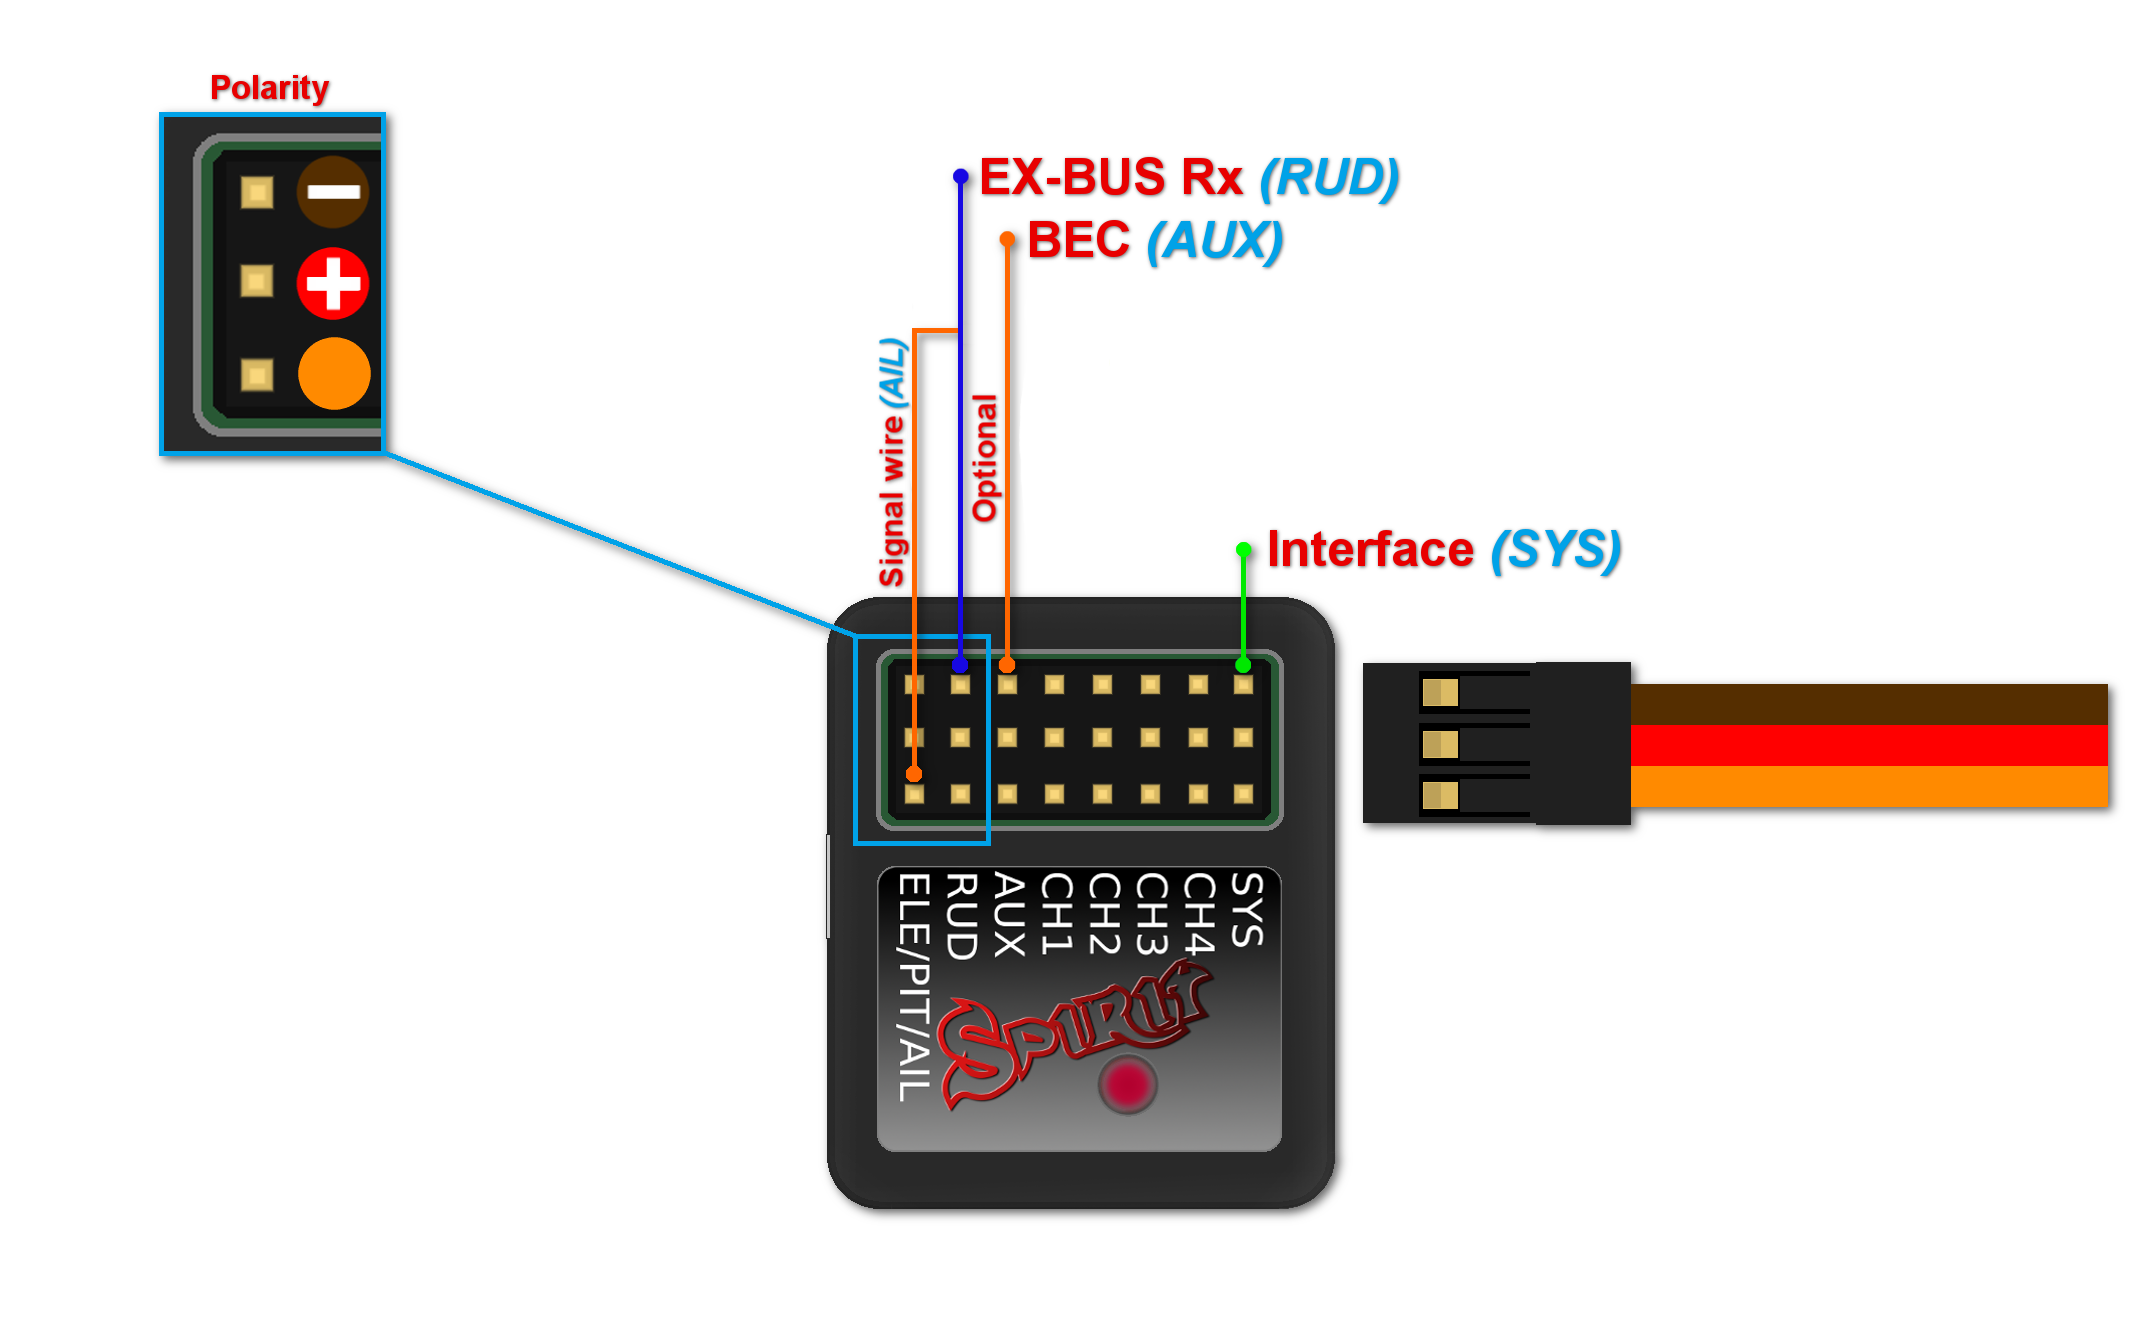
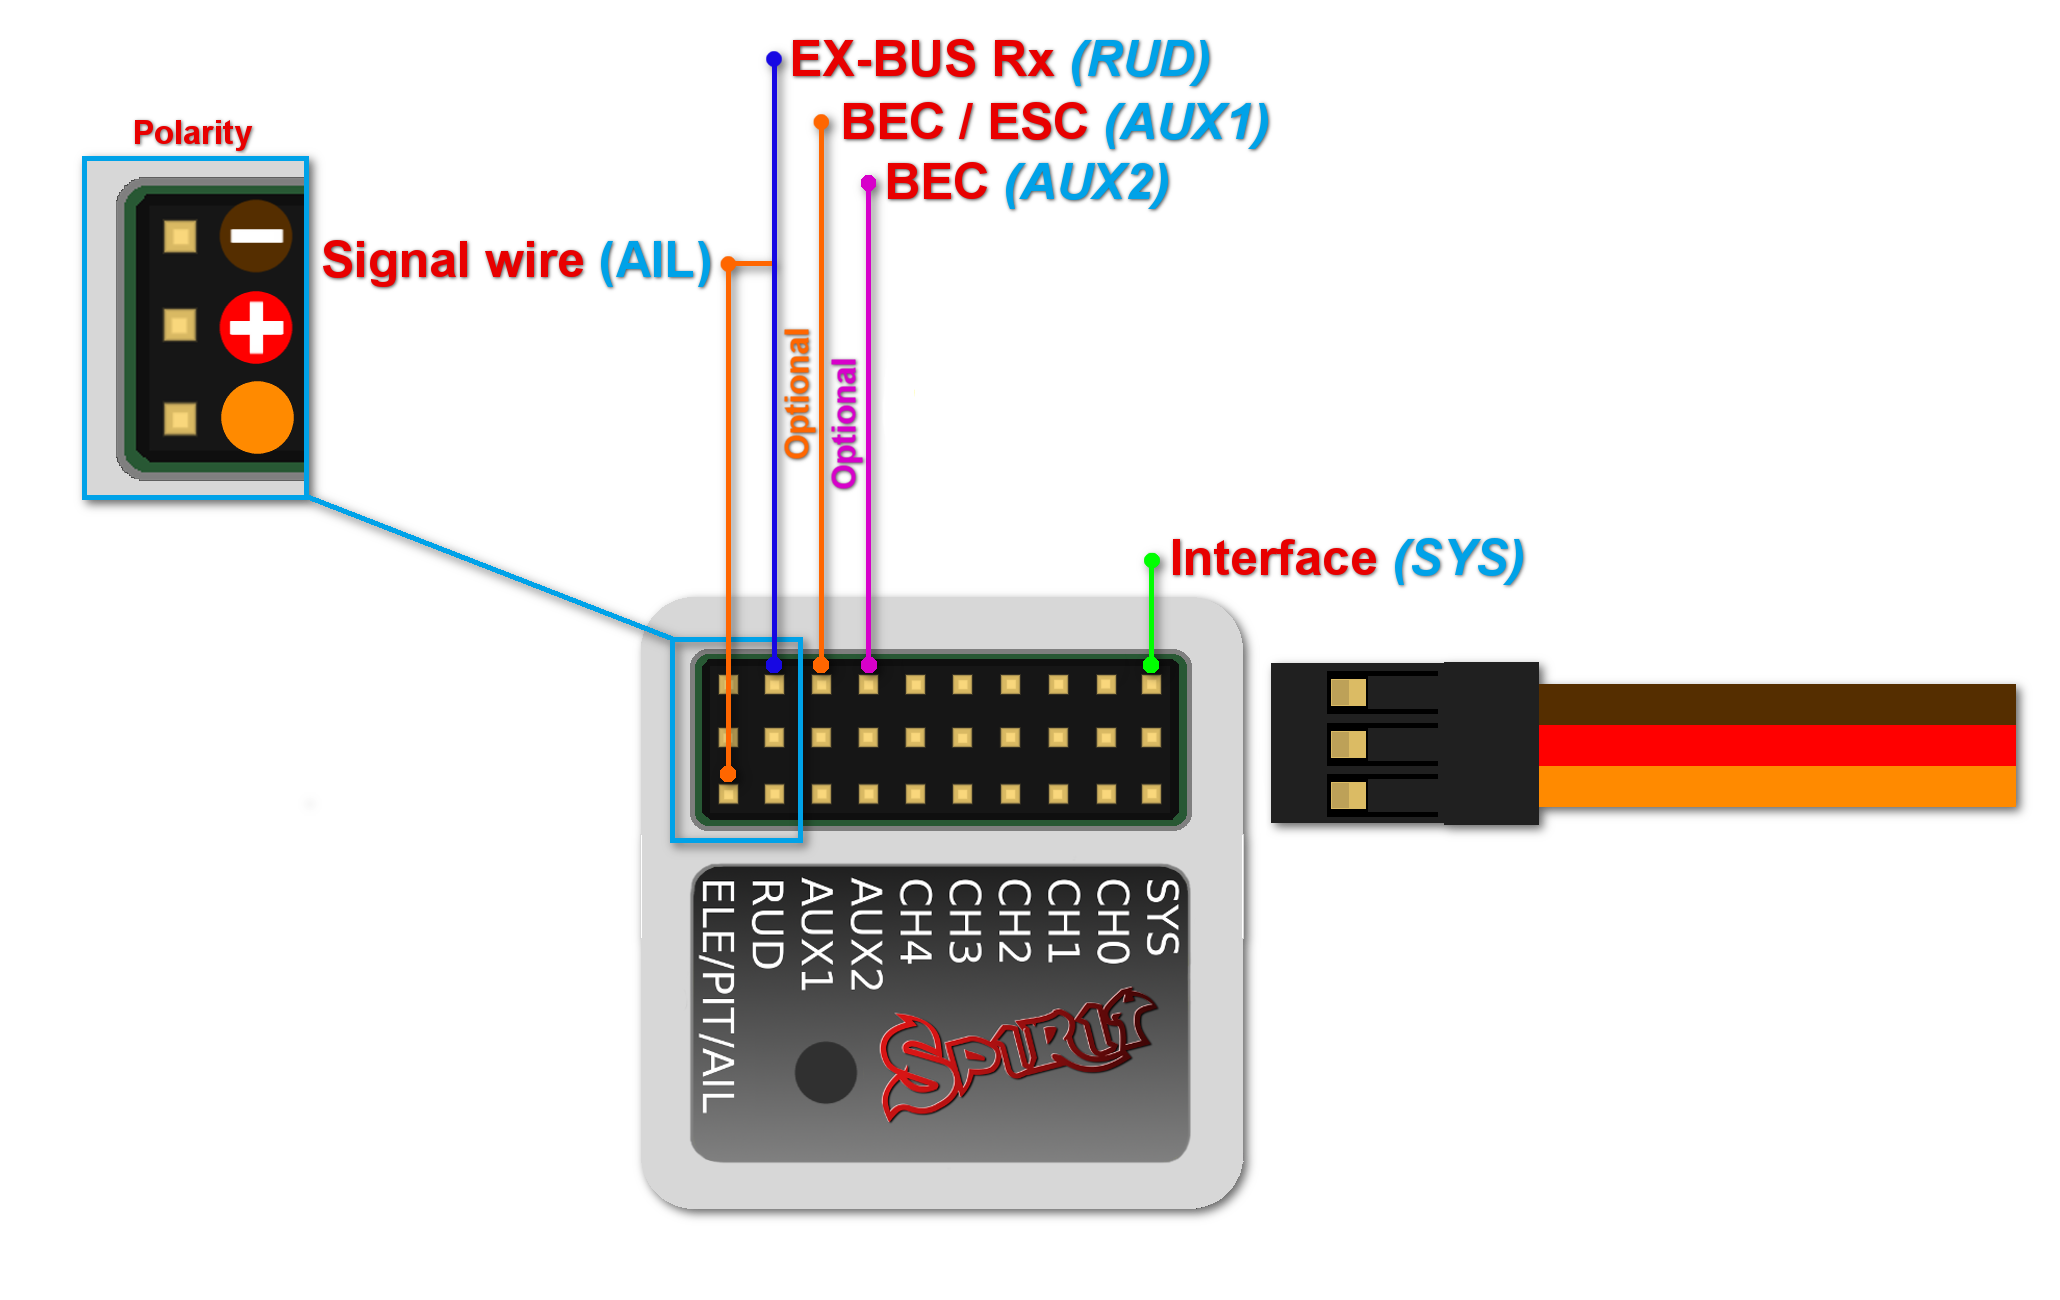
Spirit – receiver type: Jeti EX Bus
Spirit Pro – receiver type: Jeti EX Bus
NOTE
Connection to a BEC is optional. For models with standard size servos it is recommended to use dual power supply cables due to the increased power consumption. That means besides the EX Bus cable, an additional power supply cable should be connected to the AUX port.
When using this type of receiver you can connect the throttle cable directly to the receiver. Alternatively, you can assign the throttle channel in the software and use the AUX as throttle output from the unit.
A special cable is needed to enable this communication.
Never plug a connector for powering the unit to SYS or ELE/PIT/AIL ports.
7 CONNECTION OF SRXL/SUMD RECEIVER
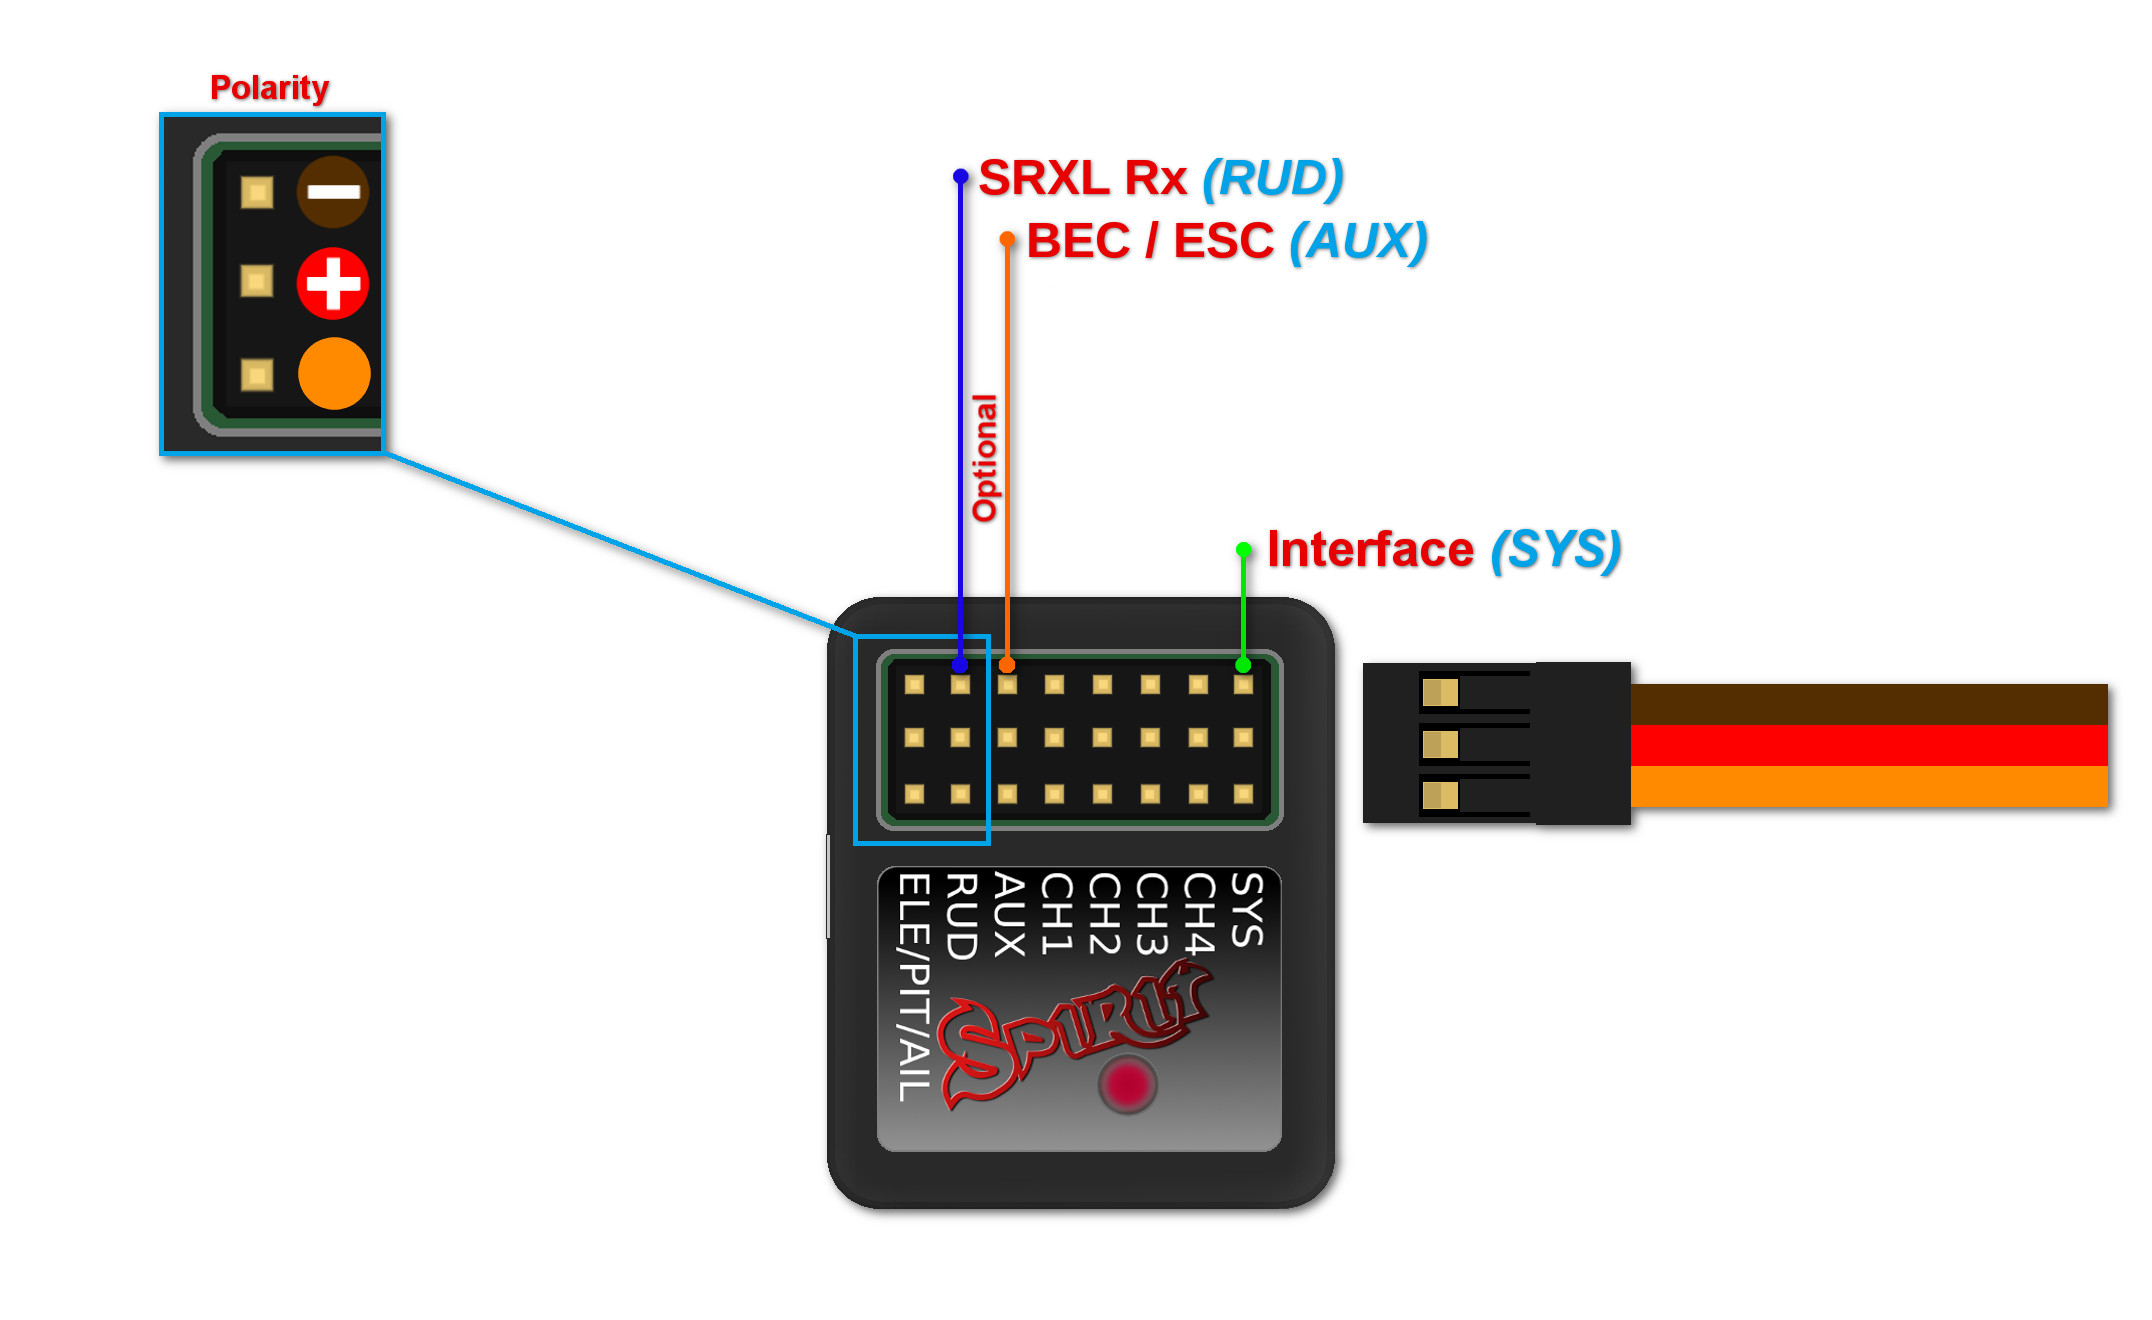
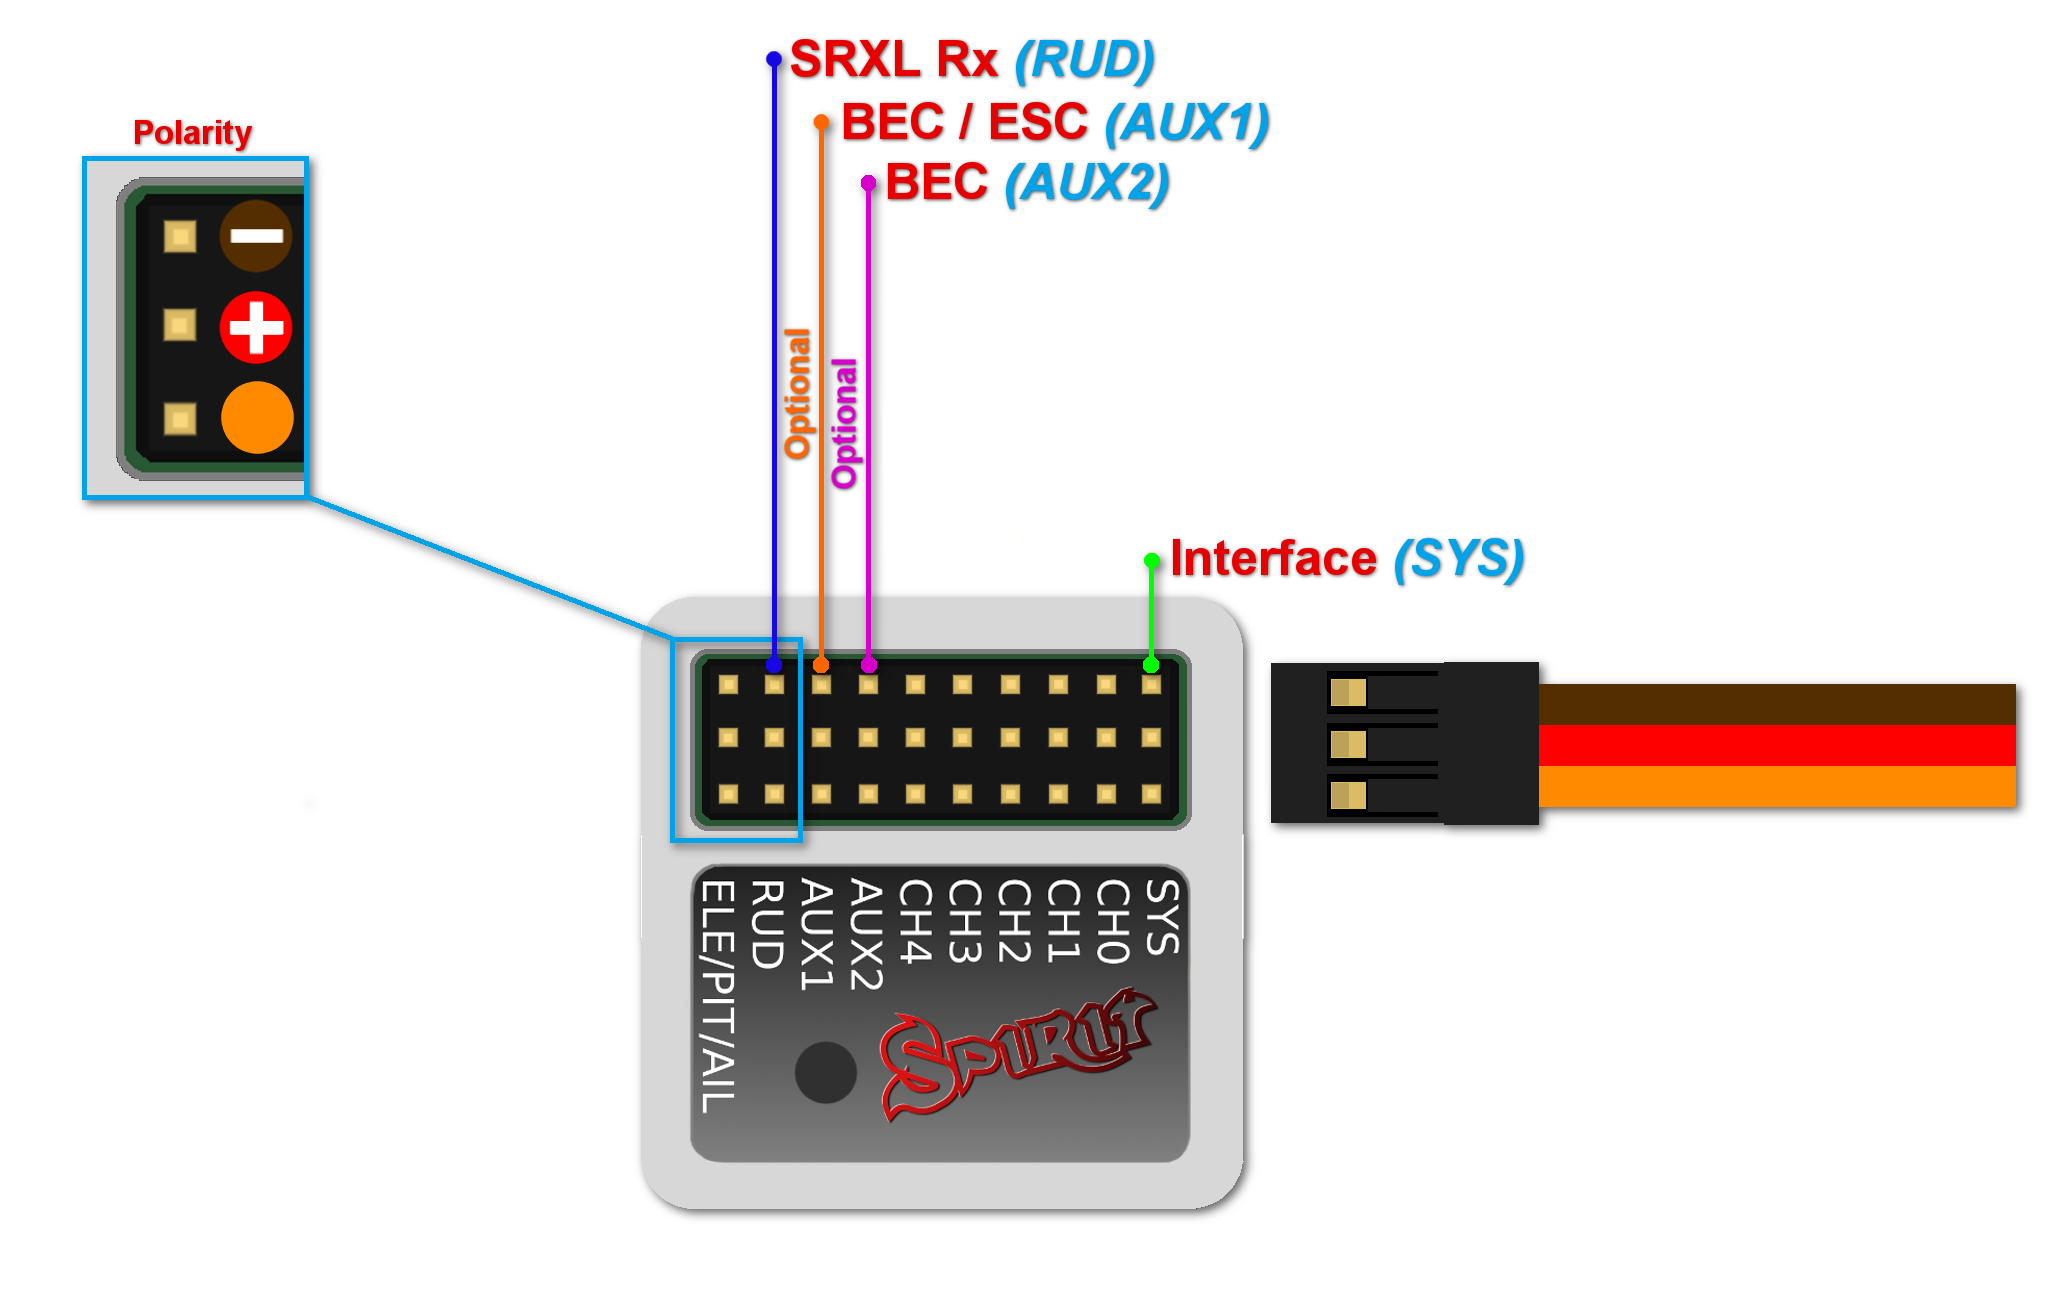
Spirit – receiver type: SRXL/SUMD
Spirit Pro – receiver type: SRXL/SUMD
NOTE
Connection to a BEC is optional. For models with standard size servos it is recommended to use dual power supply cables due to the increased power consumption. That means besides the communication cable, an additional power supply cable should be connected to the AUX port.
This protocol family can work with a wide range of receivers.
Thus you can use Multiplex SRXL, BeastX SRXL, Graupner SUMD, Jeti UDI, Spektrum SRXL and more.
When using this type of receiver you can connect the throttle cable directly to the receiver. Alternatively, you can assign the throttle channel in the software and use the AUX as throttle output from the unit.
Never plug a connector for powering the unit to SYS or ELE/PIT/AIL ports.
8 CONNECTOR ORIENTATION
All cables connected to the unit must be oriented so that the signal wire (Lightest color wire) is closer to the connector pin label, towards the center of the unit. This orients the negative (darkest color wire) toward the edge of the unit.
