Jeti integrace
Od verze 1.3.0 je k dispozici Jeti integraci pro Spirit Aero! To znamená, že je možné jednotku plně konfigurovat přímo z Jeti vysílače bez použití počítače.
Contents
1 Požadavky
Pro správnou funkci budete potřebovat:
- Soupravu Jeti Duplex DS/DS 14, 16 nebo 24
- Přijímač Jeti Duplex s volným EX portem.
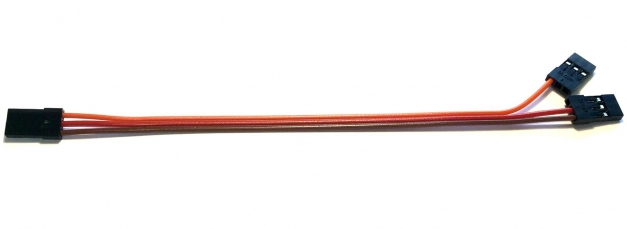
- Propojku pro integraci dostupnou v našem obchodě.
2 Zapojení
Jeti propojka je schopna přenést veškerá data pro kanály a telemetrii. To znamená, že kromě propojky samotné již není zapotřebí další kabel.
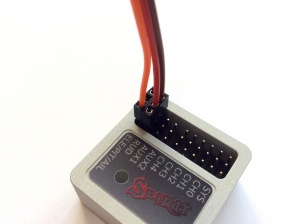
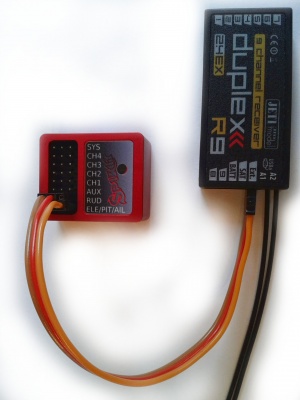
Na straně přijímače je nutné zapojit servo kabel do portu EX Bus.
- U nových REX přijímačů je označen E1 nebo E2 (s EXT nebude funkční).
- Starší EX přijímače značí port vždy jako EXT.
Jestliže používáte EX přijímače s připojeným telemetrickým čidlem k EXT portu, pak máte dvě možnosti:
- Použít připojení přes UDI (přijímač typu SRXL/SUMD) - v tomto případě přijdete o Jeti integraci.
- Zakoupit REX přijímač, na kterém je možné zapojit telemetrická čidla i Jeti integraci současně.
3 Program Spirit Aero
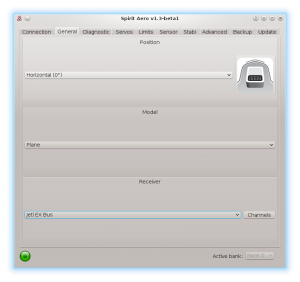
Nyní lze připojit napájení k jednotce. V případě, že jste ještě nezapojili napájení do jednotky, je možné využít porty AUX1, AUX2 a nebo CH0 nebo přímo do přijímače. Předtím, než je možné zapnout integraci Jeti a spojení EX Bus je důležité nastavit typ přijímače na EX Bus. Toto nastavení je nutné provést v konfiguračním software, záložka obecné. Spusťte aplikaci Spirit Settings a změňte typ přijímače jak je znázorněno na snímku. Poté nastavení ulože (např. pomocí CTRL+S) nebo záložky Záloha/Jednotka - Uložit a jednotku následně restartujte.
4 Menu integrace
Jakmile je jednotka inicializována, je možné vstoupit do menu Jeti integrace. Stiskněte tlačítko MENU na vysílači.
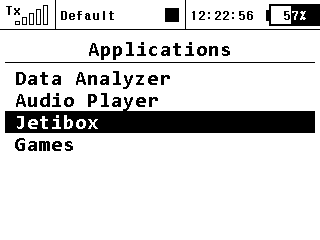
Poté zvolte menu Aplikace/Jetibox pomocí otočného tlačítka.
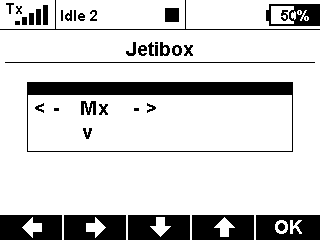
By buttons under display move from Rx to Mx option and press Down arrow button to enter the Mx menu.
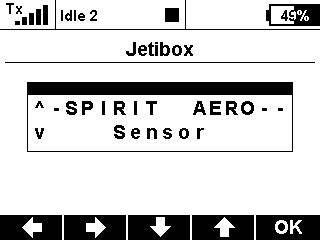
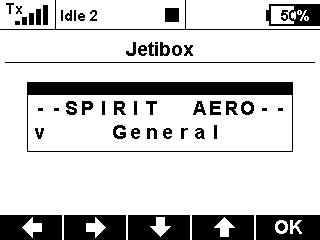
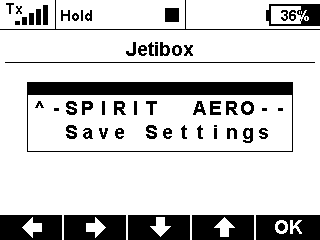
Pokud je zapojení a zvolený typ přijímače v pořádku, uvidíte menu integrace SPIRIT AERO.
4.1 Stil can't see the Spirit?
If you have everything right, but the integration menu is still not available, then the only problem can be that the EX Bus port of your receiver is configured to a different protocol.
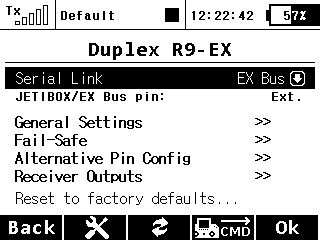
In this case, enter the configuration menu of your receiver in the Device Explorer - the entry has name of your receiver. Change the Serial Link to the EX Bus. In case of the REX receivers you can assign E1 or E2 port to EX Bus in the Alternative Pin Config menu.
5 Usage
Whenever you want to configure a parameter, go to the Applications/Jetibox/Mx. There the Menu Layout is nearly identical with the PC software to have easy navigation.
It is working in the same way as when the PC software is connected. This mean that when Jeti Integration menu is opened, you can change even the basic parameters that could affect the model significantly.
When using Bank Switching or Real-Time tuning features the menu will take full control of it. The unit will not react to a Switch position changes. For the Bank Switching there is a menu Bank in the main menu where you can manually change the banks.
Always close the integration menu with long press of Up arrow button. Otherwise Bank Switching or Real-Time tuning features will be temporarily disabled. When closed correctly, the unit's Status LED will be steady on.
Do not forget to click the Save Settings in the integration menu when you want to save a changes permanently.
6 Preset for transmitter
You can use our preconfigured profile for the transmitter where everything should be configured to be ready to fly.
The profile has enabled:
- Flight modes
- Bank Switching
- Rescue/Stabilisation modes (activated by a Separate channel)
You can download it right here (Optimized for Jeti DS-14). Then unzip the file and save the JSN file to your transmitter (SDCard) to the Model directory.
In your transmitter there will be new profile called Spirit FBL that you can select.
Enjoy the integration!
7 Channel Mapping
In case that your channels are not matching, we recommend to leave default channel mapping in the unit and to change it in your transmitter.
You can do so in the Model - Servo Assignment menu.
Channel Layout:
- Throttle
- Aileron
- Elevator
- Flaps
- Rudder
- Gyro sens.
- Bank (if used)
- Stabi (if used)
8 Telemetry data
In order to display Telemetry data you have to scan for new sensors first. Go to Menu - Timers/Sensors - Sensors/Logging Setup and then press AUTO button. Scanning will take a few seconds untill all Telemetry variables will show up.
- S Vibes [%] - Vibration level from all axes (0 - 10% is normal level)
- S RPM [Head RPM] - RPM provided by RPM sensor.
- S Voltage [V] - ESC Telemetry | Main Battery voltage
- S Current [A] - ESC Telemetry | Main Battery current
- S Capacity [mAh] - ESC Telemetry | Main Battery consumed capacity
- S Temp [°C] - ESC Telemetry | FET temperature
Once scanning is finished you can add these variables onto the main screen. Go to Menu - Timers/Sensors - Displayed Telemetry and press the ADD button. Add all Telemetry data you want to display.
