Jeti Integration
Ab Version 1.3.0 können Sie die JETI-Integration nutzen! Das bedeutet, Sie können Spirit-Geräte völlig mit JETI-Sendern in Echtzeit konfigurieren, ohne dass ein Computer benötigt wird.
Contents
1 Voraussetzungen
Damit es funktioniert brauchen Sie:
- Jeti Duplex Sender: DC/DS 14 or 16 or 24
- Jeti Duplex-Empfänger mit einem freien EX-Port
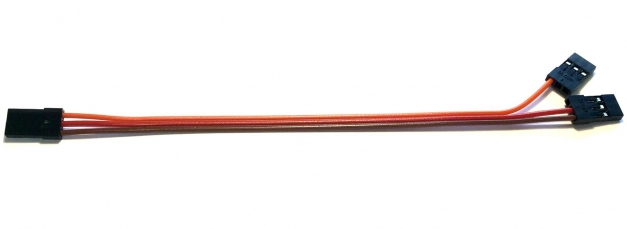
- Jeti Integrationskabel in unseren Filialen erhältlich.
2 Verkabelung
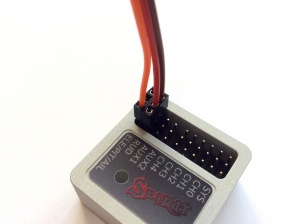
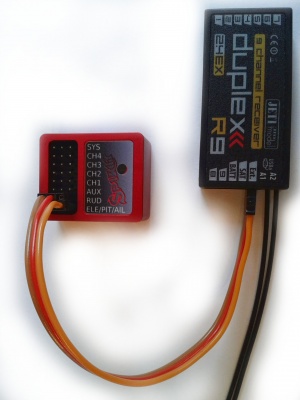
Das Jeti-Kabel ist in der Lage, alles zu übertragen, einschließlich Kanaldaten und Telemetrie. Das bedeutet, dass Sie nichts anderes als dieses Kabel anschließen müssen.
Auf der Empfängerseite muss das Servokabel an den EX-Busanschluss angeschlossen werden.
- Für neue REX-Empfänger ist die Anschlussbezeichnung E1 oder E2 (EXT Anschluss funktioniert nicht).
- Bei älteren EX-Receivern ist die Anschlussbezeichnung immer EXT.
Wenn Sie EX-Empfänger mit angeschlossenem Telemetriesensor zum EXT-Anschluss verwenden, haben Sie in diesem Fall zwei Möglichkeiten:
- Benutzen Sie eine UDI-Verbindung (SRXL / SUMD-Empfängertyp)- In diesem Fall verlieren Sie die Jeti-Integration.
- Kaufen Sie einen REX-Receiver, wo Sie Telemetriesensoren und die Jeti-Integration zusammen nutzen können.
3 Spirit Aero software
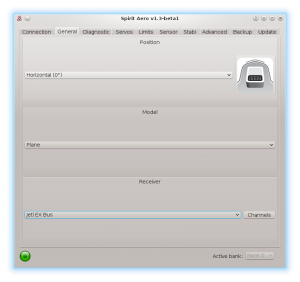
Jetzt sind Sie bereit, das Gerät einzuschalten. Wenn Ihre Stromversorgung noch nicht angeschlossen ist, empfehlen wir den Anschluss an die Buchsen AUX1, AUX2 und / oder CH0. Bevor Sie die Jeti-Integration und die EX-Bus-Verbindung nutzen können, ist es wichtig, den EX-Bus-Empfängertyp auf der Registerkarte Allgemein in der Software einzustellen. Bitte starten Sie die Spirit-Einstellungen und ändern Sie den Empfängertyp, wie auf dem Foto angezeigt. Speichern Sie dann die Einstellungen (z. B. durch "CTRL + S") oder im "Backup-Register/Unit-Save" und starten das Gerät neu.
4 Integration MenÜ
When unit is initialized you are able to enter the Jeti Integration menu. Press the MENU button of the transmitter.
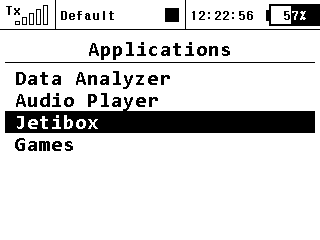
Then go to the Applications/Jetibox menu by a rotary knob.
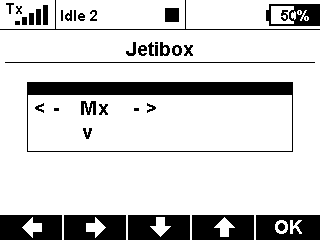
By buttons under display move from Rx to Mx option and press Down arrow button to enter the Mx menu.
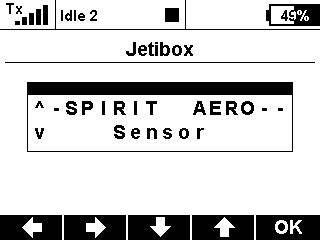
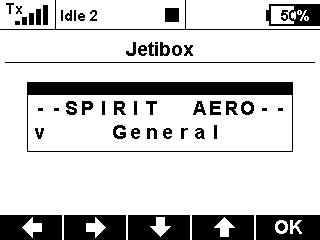
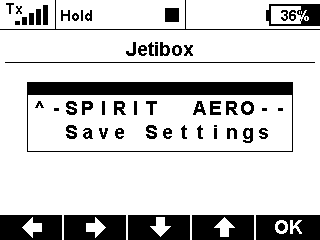
There, if the wiring and receiver type is correct, you will see the SPIRIT AERO integration menu.
If you have everything right, but the integration menu is still not available, then the only problem can be that the EX Bus port of your receiver is configured to a different protocol.
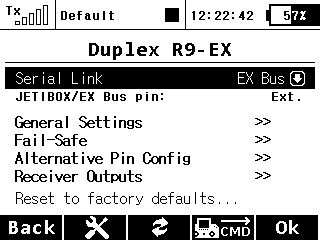
In this case, enter the configuration menu of your receiver in the Device Explorer - the entry has name of your receiver. Change the Serial Link to the EX Bus. In case of the REX receivers you can assign E1 or E2 port to EX Bus in the Alternative Pin Config menu.
5 Usage
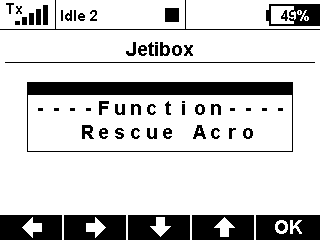
Whenever you want to configure a parameter, go to the Applications/Jetibox/Mx. There the Menu Layout is nearly identical with the PC software to have easy navigation.
It is working in the same way as when the PC software is connected. This mean that when Jeti Integration menu is opened, you can change even the basic parameters that could affect the model significantly.
When using Bank Switching or Real-Time tuning features the menu will take full control of it. The unit will not react to a Switch position changes. For the Bank Switching there is a menu Bank in the main menu where you can manually change the banks.
Always close the integration menu with long press of Up arrow button. Otherwise Bank Switching or Real-Time tuning features will be temporarily disabled. When closed correctly, the unit's Status LED will be steady on.
Do not forget to click the Save Settings in the integration menu when you want to save a changes permanently.
6 Preset for transmitter
You can use our preconfigured profile for the transmitter where everything should be configured to be ready to fly.
The profile has enabled:
- Flight modes
- Bank Switching
- Rescue/Stabilisation modes (activated by a Separate channel)
You can download it right here (Optimized for Jeti DS-14). Then unzip the file and save the JSN file to your transmitter (SDCard) to the Model directory.
In your transmitter there will be new profile called Spirit Aero that you can select.
Enjoy the integration!
7 Channel Mapping
In case that your channels are not matching, we recommend to leave default channel mapping in the unit and to change it in your transmitter.
You can do so in the Model - Servo Assignment menu.
Channel Layout:
- Throttle
- Aileron
- Elevator
- Flaps
- Rudder
- Gyro sens.
- Bank (if used)
- Stabi (if used)
8 Telemetry data
In order to display Telemetry data you have to scan for new sensors first. Go to Menu - Timers/Sensors - Sensors/Logging Setup and then press AUTO button. Scanning will take a few seconds untill all Telemetry variables will show up.
- S Vibes [%] - Vibration level from all axes (0 - 10% is normal level)
- S RPM [RPM] - ESC Telemetry | Rotor revolutions.
- S Voltage [V] - ESC Telemetry | Main Battery voltage
- S Current [A] - ESC Telemetry | Main Battery current
- S Capacity [mAh] - ESC Telemetry | Main Battery consumed capacity
- S Temp [°C] - ESC Telemetry | FET temperature
Once scanning is finished you can add these variables onto the main screen. Go to Menu - Timers/Sensors - Displayed Telemetry and press the ADD button. Add all Telemetry data you want to display.
